Blog

Understanding tile adhesive classifications and what they mean

Everyone knows what tile adhesive classifications mean don’t they? Or do they?

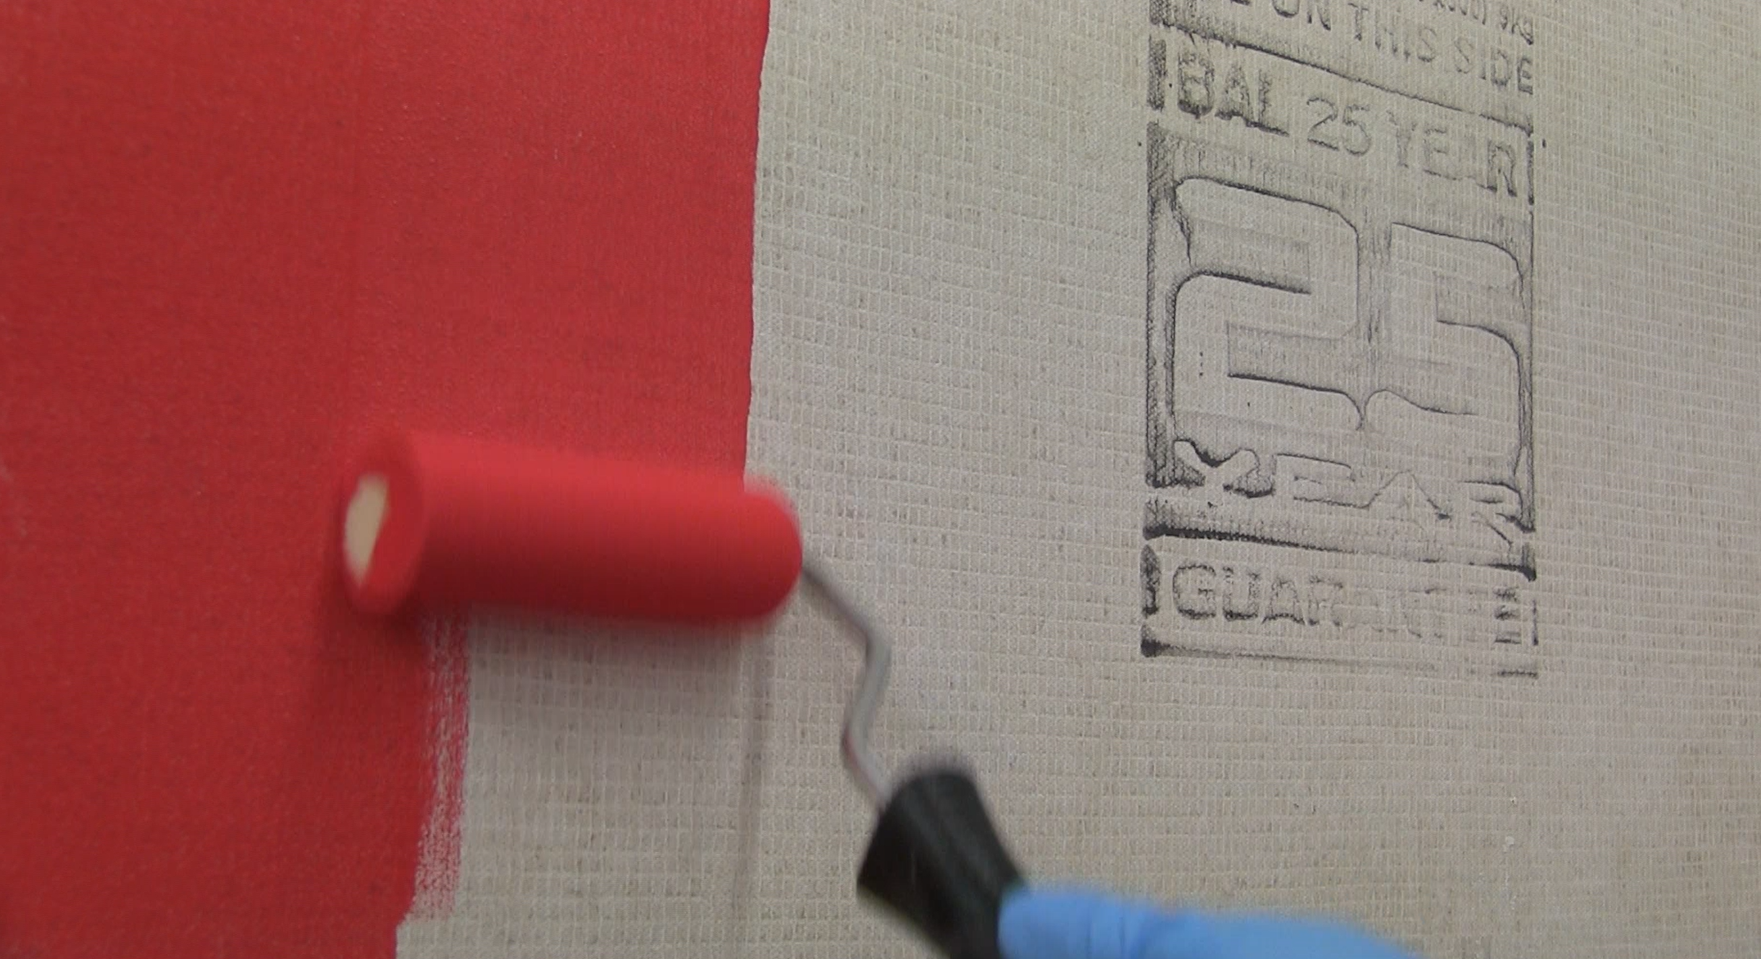
Did you know that before 1980, tile adhesives didn’t have British Standard classifications and fixers were referred purely to a suitable BAL tile adhesive for the application in hand?

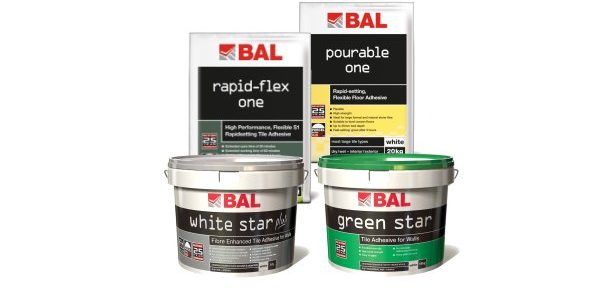
This was because Building Adhesives Ltd (BAL) was set-up specifically by the British Ceramic Tile Council (BCTC) in the 1960s. BAL was set-up to help drive forward the UK tiling industry; to produce specially designed cement-based adhesives for the new age of ceramic tiles on the domestic and commercial market. BAL would ensure there were suitable products for all applications of UK tiling and to drive standards and guidance for the industry to ensure failure-free installations.

When the first Code of Practice for wall tiling was published in 1963, with the number BSCP212: Part 1, it only contained an appendix referencing a system for testing adhesives. It wasn’t until October 1980 that the British Standards published a specific, separate standard – with BS5980 introduced with recommendations for the testing of tile adhesives.

Under BS 5980, there were five categories of tile adhesive. Today only three of these would still be recognised, whereby Type 1 was cementitious, Type 2 Dispersion (ready-mixed) and Type 5 Reaction Resin adhesives. Tile adhesives were classified by tensile and shear adhesion testing as either Class B (No requirement for water resistance), Class A (Water-resistant with a slower strength development) and Class AA (Water resistant with a faster strength development). Additional tests were included for, resistance to mould growth, open and adjustability time and excessive strain development.

This standard was available for some until the current system of classification as we know it was first introduced to the UK in 2001 as BS EN 12004:2001 after which the BS 5980:1980 standard was withdrawn and replaced. This was a candidate harmonized European Standard, including Annex ZA provisions for CE marking of adhesives for tiles.

This introduced a classification with various numbers and letters to help describe tile adhesive characteristics.

These are:

C = Cementitious

D = Dispersion

1 = Normal characteristics

2 = Improved characterises

T = Reduced slip

E = Extended open time

F = Fast setting


In 1998, a European standard for the determination of transverse deformation for cementitious based adhesive and grouts was first published (BS EN 12002). In 2002 this standard was revised where ‘classes’ of transverse deformation were introduced with cementitious adhesives classifications for “S1” or “S2” when tested in accordance with BS EN12002:2008.


The classifications are:


S1 = Deformable (in conjunction with all the above features, this adhesive also has a deformability of between 2.5mm & 5mm)

S2 = Highly Deformable (this product has a deformability of above 5mm)


Transverse deformation classes were first introduced into the tile adhesive standard update BS EN 12004:2007 + A1 2012 as part of their ‘optional characteristics’.


What does S1 and S2 mean?

In simple terms deformability means how much a solid, for example a cementitious tile adhesive, can change shape when a force is applied.

S1 and S2 categories are normally achieved with additional polymer modification of cementitious tile adhesives and is associated with the tile adhesive being ‘flexible’.

It should be noted however that cementitious tile adhesives are tested for transverse deformation until failure occurs. Flexibility, in simple terms, implies the ability to bend without breaking.

BS 5384: Part 4:2015 advises that: “Note: S2 classified adhesive and unbonded screeds are not suitable in heavily trafficked areas”.


Choose your adhesive on a case-by-case basis

Think about where the adhesive is to be applied? Are the particular tile adhesive’s characteristics suitable for the particular application and site environment and conditions?

It’s a simple fact of tiling that you should treat each project on a case-by-case basis – each background must be properly assessed and prepared i.e. free from contamination, clean, dry, rigid, stable and capable of taking the types of expected loads imposed upon it without excessive movement or vertical deflection.

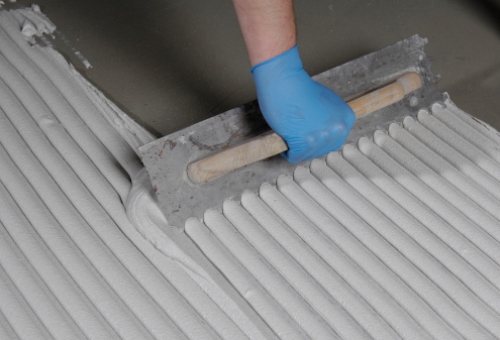
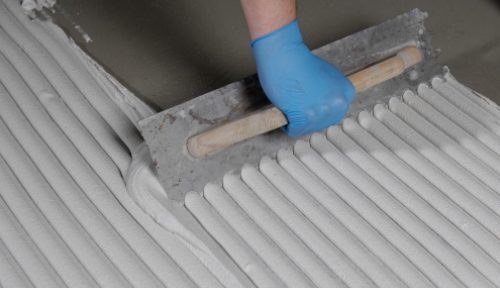
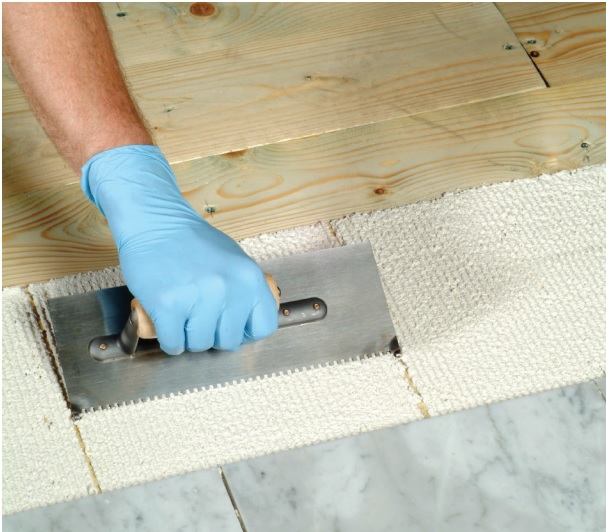
There are additional application properties which may also be considered –– is it easy to mix? Is it easy to trowel out? Would a pourable tile adhesive be a better choice in the case of large format tiles?

Maybe you need to build out the adhesives bed thickness (where suitable) in places such as window reveals, or isolated areas on the floor.

Does your adhesive need to set quickly for a fast-track application, or are there temperature / humidity considerations on site where you might benefit from the use of a normal setting adhesive? Alternatively you may need to allow additional time for the tile adhesive to set in colder temperature of a minimum of 5°C and rising.

Remember these are performance characteristics of the adhesive to consider in addition to whether your adhesive is suitable for your individual project in the first place.

Although classifications provide a consistent guide, it should be remembered these are specific tests in laboratory conditions. Consideration should be given to the performance ability stated by the manufacturer on packaging and the Technical Data Sheets as these should clearly confirm where the product can or cannot be used.

Product performance may also differ in real-site conditions with more extreme temperatures and conditions than in a laboratory test. -At BAL our product claims are always based on the true, varied on-site conditions we meet across the UK, not just the standard achieved by product EN testing.

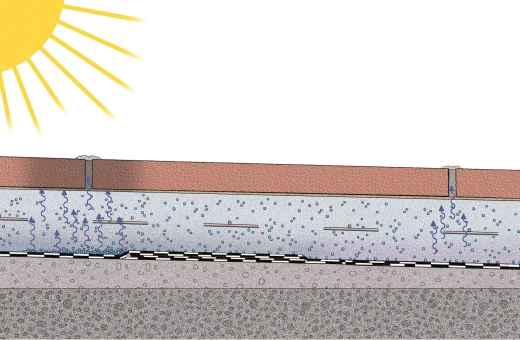
Using an S2 with an uncoupling mat

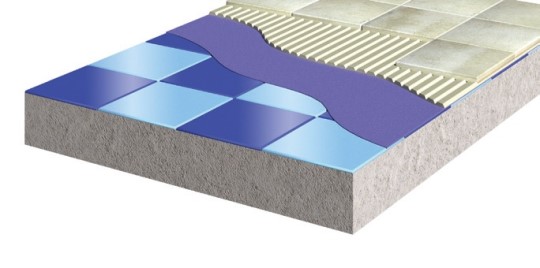
Another interesting question we often get asked – “can I just use an S2 with an uncoupling mat to get over difficult floors”. For the reasons stated above, the use of an uncoupling matting or a highly deformable S2 adhesive will not compensate for a poorly constructed or poorly prepared floor substrate.

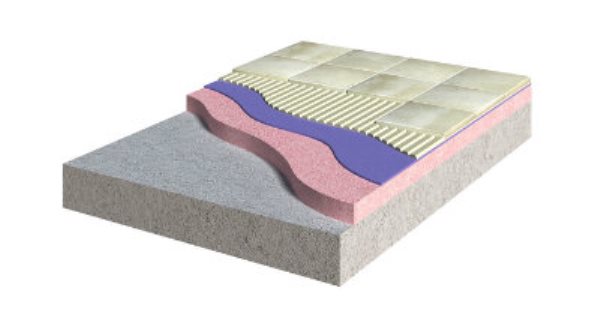
The same would be said if tiles were applied to the uncoupling matting using an S2 adhesive.  The uncoupling membrane is designed to neutralize lateral stresses that occur between the floor substrate and the tile covering. The use of an S2 tile adhesive for the application of ceramic tiles on top of the uncoupling matting would have no additional benefits and may further reduce impact resistance of the flooring to any loads imposed upon it.

In fact, uncoupling product manufacturers have, for years recommended a C2 adhesive only, for use with uncoupling membranes. Always seek further advice from the tile adhesive and uncoupling matting manufacturer.

Want to know more? Join us for a special webinar on Understanding Adhesives and Grouts at 6pm on July 24th on our Facebook Page – Facebook.com/BALTiling.

Alternatively contact your local technical team member.


How to lay porcelain slabs

The last few years has seen a massive increase in the popularity of external tiling installations using a range of materials, but primarily external self-supported porcelain (typically 20mm porcelain), slabs, pavers and natural stone. Want to find out how to lay porcelain slabs?

Here we outline the two most common installation methods using BAL’s new external tiling range.

Fixing onto pre-prepared Type 1 MOT sub-base or concrete where a build-up of more than 20mm is needed

This traditional wet-on-wet fixing method is favored most by landscapers and paving installers and involves the use of a semi-dry bedding mortar mix and a priming slurry bonding coat on the back of the tiles.

  1. Firstly ensure that the subbase is of a suitable Type 1 MOT grade, laid to the correct depth and fully compacted with a whacker plate.

The sub-base should be stable and not liable to settlement.

  1. All external pavers and tiles should be free of standing or pooling water, so ensure that adequate falls are introduced to the concrete or Type 1 MOT to drain the water towards a suitable disposal point i.e. a gully, linear drain or the edge of a terrace or patio. Wherever possible, surface water should be directed away from any buildings.
  2. Where the patio is adjacent to the house, particular attention should be paid to drainage, and the patio’s height must be significantly below that of any damp proof courses.
  3. Once fully prepared, the Type 1 MOT or concrete subbase should be primed with 2-3mm of a slurry bonding coat such as BAL Priming Slurry Bond. Each bag of BAL Priming Slurry Bond should be mixed 6.4ltr of clean, cold water and then applied with a brush or roller.BAL Priming Slurry Bond poured onto Type 1 MOT
  4. A bedding mortar should then be applied wet-on-wet and then compacted down to the required height. One option is BAL Bedding Mortar, which should be mixed with 2 litres of water per 25kg bag to provide a semi-dry consistency. BAL Bedding Mortar should be mixed with a forced action mixer. Please note: Normal ‘free-‘fall’ mixers are not suitable for mixing semi-dry screed mortars. Use clean equipment and do not use other cement, lime or screed additives etc., in the mix.
  5. The working time of the mixed mortar is in excess of 1 hour at 20°C. The amount of mortar mixed and the area to be screeded should be limited so that trowelling off, finishing and tile fixing can be completed within the working time.
  6. Where a new bay is laid against a set and hardened mortar bed, it is recommended that such daywork joints are vertical and treated with the BAL Priming Slurry Bond, with the BAL Bedding Mortar applied onto the wet slurry.
  7. On concrete substrates, BAL Bedding Mortar can be applied as required from min. 10mm to max. 100mm thicknesses.
  8. On Type 1 MOT sub-bases, BAL Bedding Mortar should be applied as required from min. 25mm to max. 100mm thicknesses.
  9. To fix an external porcelain tile, paver, slabs or natural stone, while the Bedding Mortar is still wet, apply another coat of BAL Priming Slurry Coat at 2-3mm on top of the Bedding Mortar, as well as a thin coat to the back of the tile or paver to ensure 100% coverage is achieved.
  10. Adjust the position of the porcelain tile, paver or slab and tap down with a rubber mallet.
  11. After 12 hours, the tiled surface can be grouted with BAL Terrace Grout. Hard wearing, water and frost-resistant, BAL Terrace Grout can be used for joint widths up to 15mm. Once applied, a first wash can be carried out after the grout has firmed up in the joint. A final wash-off can be carried out once the grout is fully set in the joints. BAL Terrace Grout can be subjected to normal site conditions after 24 hours.

BAL Terrace Grout applied to porcelain tile joints

Fixing external porcelain, pavers, slabs or natural stone onto new or damaged concrete suitable for direct tiling

This method uses BAL Level Out external leveller and is most suited when fixing porcelain, pavers, slabs or natural stone (suitable for external use) direct to an existing concrete base which may be rough or impact damaged. This direct fixing method is essentially the same as internal tiling and can be used for patios, terraces or driveways. The caveat being that expansion joints need to be incorporated into the subfloor, and falls will need to be added to ensure rainwater drains away fully. An effective DPM should also be incorporated into any direct-to-earth subfloors.

  1. Before direct fixing, the concrete base must be fully cured and free from efflorescence, laitance, dirt, polished concrete and other loose materials. These should be removed using suitable mechanical methods. Some exposed aggregate should be visible in the surface but not loose.
  2. Thoroughly dampen the substrate to be levelled with water, taking care not to leave any pools of water, before applying the product to the dampened substrate.
  3. Mix each bag required with approximately 5.25ltr of water. Please note that using excess water can reduce the strength of the set and hardened mortar. Each bag should be mixed thoroughly until a lump-free mortar is obtained. We would recommend using an electric mixing paddle with a 10m chuck at slow speed (600 -1000 rpm).
  4. If gradient levelling has is to be carried out, the water content can be reduced slightly.
  5. BAL Level Out should be applied within 30 minutes of mixing and can be applied from 2mm to 20mm in bed thickness.
  6. The mixed mortar will flow out and self-smooth during the first 10 minutes of its 30-minute working time. Spread the mortar using a steel trowel or float and then spike roll if required to remove any air pockets. A long handled smoothing trowel can be used to simplify the finishing operation.
  7. BAL Level Out can be tiled after approximately 3 hours. Once set, the freshly applied BAL Level Out should be protected from adverse climatic conditions, e.g. rapid drying air flow, direct strong sunlight, rain, frost etc., until hardened.
  8. Once BAL Level Out has fully cured, external tiles, porcelain, slabs, pavers or natural stone can be fixed using a suitable BAL tile adhesive such as BAL XL Floor One.
  9. XL Floor One should be mixed with 4.2ltr of water per 20kg and provides a pourable adhesive that can be built up to 25mm in bed depth. Fully wettable with a thixotropic nature, BAL XL Floor One One provides excellent coverage on the back of the tile – without the need of back buttering on flat surfaces. On heavily keyed tiles, back buttering may still be required.
  10. BAL XL Floor One should be applied using a large format trowel. It has a 1 hour pot life and sets in 6-8 hours for fast-track project completion.
  11. Once the adhesive is dry, grouting can commence with BAL Terrace Grout.

BAL has a number of services to support installers including a nationwide team of Training and Technical Support Managers, plus trusted technical advisors available on the phone or on-line.

For full installation advice and on-site specifications, please call BAL on 03330 030160 or email info@building-adhesives.com


How to waterproof showers, bathrooms and wetrooms with BAL Waterproof 1C

Waterproofing is a crucial part of any tiling installation in wet areas. This guide to how to waterproof showers, bathrooms and wetrooms with BAL Waterproof 1C gives you precise information on how to ensure your backgrounds are safe from damage.

While tiles are inherently waterproof, adhesives and grout aren’t and subsequently can’t prevent water travelling through the joint and into backgrounds and substrates.

Over time, continued exposure to water may damage your backgrounds, resulting in the formation of black mold or even full tile installation failure!

In fact tanking is now recommended in all domestic and commercial installations by British Standards 5385-1:2018, which states: ‘In wet areas, e.g. showers, wet rooms and steam rooms, substrates should be protected with a suitable proprietary tanking membrane system’

One such approved tanking membrane is BAL Waterproof 1C – a new one-coat, ready-mixed waterproofing solution for showers, bathrooms and wetrooms in internal environments.


It is easy to apply in eight easy steps, with no priming is required on most substrates:

  1. BAL Waterproof 1C can be applied without priming onto plasterboard, cement:sand render, screeds, concrete, plywood overlays, BAL Board (on the smooth side) and BAL Rapid-Mat uncoupling mat system.
  2. If waterproofing onto plaster, cement boards or BAL Board on the tiling side, then prime all surfaces with one coat of neat BAL Primer 1C using a roller or sponge and allow to dry for 15-30mins.How to waterproof - BAL Primer 1C
  3. Before applying BAL Waterproof 1C, use self-adhesive BAL Scrim Tape at:
  • Internal and external corners of walls/partitions.
  • Wall junctions with base/upstands/columns.
  • At pipe penetration points/drainage channels/outlets.
  • Junctions of different base/background materials.
  • Cracks and board joints in backgrounds over 3mm wide.How to waterproof - BAL Scrim Tape
  1. Apply the tape and then brush over with BAL Waterproof 1C – use ready-mixed straight out of the bucket, no mixing needed!
    How to waterproof - BAL Waterproof 1 C brushing in
  2. Using a suitable roller, 4mm notched trowel or brush, apply BAL Waterproof 1C over the whole area. For cracks between 2-3mm such as board joints, brush the coating into the joints to ensure they are adequately filled.How to waterproof - crack bridging
  3. When applying on the wall, apply one coat of BAL Waterproof 1C to walls but ensuring a minimum of 0.8mm. thickness.How to waterproof - roller
  4. When applying BAL Waterproof 1C to floor, ensure it is a min. 1.6mm. thickness. This can usually be achieved with a roller but two coats maybe required to achieve the thickness. We would recommended to use two coats on the floor to ensure the required thickness.How to waterproof - floor
  5. Once applied, allow membrane to dry for a minimum of 2 hours before tiling with a suitable BAL tile adhesive.

For the latest technical or health and safety information on this product, consult the current technical or safety datasheet online at https://www.bal-adhesives.com/

Free Screed Moisture Testing

When tiling to a newly laid screed it is essential that it’s dry enough to tile. As the screed dries it will shrink and move, so tiling too soon will cause the tiles to ‘blow’ or crack resulting in costly repairs. A moisture content of 0.5% or less is the target, 1.0% or less and most decoupling membranes can be used or 1.5% or less for BAL Flexbone 2Easy. Of course if it is a anhydrite/gypsum screed it can take a LOT longer to dry out and then you will also need to remove the laitence and prime.

BAl Flexbone 2Easy is a floating uncoupling mat that can be installed without the need to stick it to the sub floor. This is a huge bonus for sensitive or heritage floors that need to be protected, or in rental properties & showrooms where the floor may need to be removed or changed frequently. Flexbone 2Easy also removes the requirement for laitence removal and priming, saving you time & money and allowing you to move onto the next job quicker.

When you are using a BAL tiling system, or if you are a YOU+BAL member you can benefit from requesting a free site visit to test the screeds readiness for tiling. Call BAL Technical Support on 03330 030160 to arrange a free test!

Ready-mixed or Powdered?

It’s an age-old predicament, can I use a ready-mixed tile adhesive, or do should I go for the conventional cement-based powdered tile adhesive?

The truth lies behind how the product dries. Ready-mixed is generally easier to use as it can be spread straight out of the bucket and does not require water or mixing (hence the name). While ready-mixed adhesives (e.g. BAL White Start Plus) are perfect for fixing 300x300m ceramic tiles or metros, at BAL we would never recommend using such a product when using large porcelain (over 100mm x 100mm), large-format tiles and tiling floors.

This is because the drying chemistry behind a ready-mixed product doesn’t function well within these environments as it requires a greater amount of water evaporation.

If you think about the product itself, it’s already wet, meaning the moisture levels in the adhesive are significantly higher than in a powdered product – resulting in longer drying times and a greater need to have access to air for moisture evaporation.

Take porcelain tiles for example: they have a non-porous surface, which reduces access to air. If they were attached to a surface using a ready-mixed adhesive, the middle of the tile would remain wet and fail to attach. This is called picture framing. The result can be disastrous, leading to unnecessary expense and time wasted, as the tiles will initially attach but are then at risk of coming loose or cracking when the adhesive fails to fully dry.

The same premise is also applicable to large-format tiles. Again, the larger surface area reduces access to air for moisture evaporation, and as any builder and merchant will know, these tiles are heavy. The result of a large-format tile failing to stick isn’t just costly and time consuming; it’s potentially dangerous – especially if the tile is fixed above shoulder height.

The same rules apply to the environment in which a tile is being used. If it’s a wet environment, there is an inevitable reduction in moisture evaporation, meaning the tiles will never fully dry and fix. When applying tiles to a floor, professional builders will need to consider that impact and movement is greater than on a wall. If a tile has been fixed using a ready-mixed adhesive, the likelihood of cracking is increased, as the surface beneath may still be wet – weakening the tile and increasing the chances of slipping or cracking.

Although ready-mixed is generally cheaper and easier to use, it is worth investing a few extra pounds into a powdered tile adhesive (e.g BAL Rapid-Flex One) for such jobs. Powdered tile adhesives use a different drying chemistry. This provides added flexibility when it comes to the hold and drying consistency, helping the product to dry throughout, rather than in just the exposed areas.

Powdered adhesives are ideal for large-format, natural stone and porcelain tiles and help to adhere a tile to floors and wet environments. The added strength, flexibility and drying consistency are absolutely essential to ensure a quality and long-lasting hold.

Powdered cement-based tile adhesives also provide significant time savings to builders as they can be grouted quicker than ready-mixed tile adhesives. For example, BAL Rapid-Flex One can be grouted after only 3 hours (at 20°C) while a ready-mixed adhesive (such as BAL White Star Plus) may take up to 24 hours to dry and be ready for grouting.

In short, always question the environment that is being tiled and the tile type being used before advising on a ready-mixed over a powdered adhesive. This will save you time, money and a lot of hassle, ensuring you get a quality result from start to finish with peace of mind that the job has been delivered to the highest of standards.


Tiling over existing vinyl tiles


When faced with tiling over vinyl tiles we would recommend the following:

  1. Ideally remove, mechanically, about 80% of the old vinyl adhesive residue, exposing the concrete floor beneath.
  2. If you are able to do this using a long handled scraper, needle gun (if appropriate) or other type of suitable mechanical abrasion tool, direct fixing of the ceramic tiles may be carried out using e.g. BAL Rapid-Flex One or other suitable BAL Adhesive depending on the background.
  3. Priming should only be necessary if the exposed concrete appears to be porous/absorbent after treatment to remove the residues. In this is the case vacuum off all loose dusty material from the surface and prime use BAL Prime APD (Diluted 1:1 by volume with water).
  4. If you are not able to remove 80% of the residue, then providing all of the loose vinyl adhesive residues are removed mechanically and the remaining residues are sound and well bonded to the concrete , apply BAL Level Max in a minimum 3mm bed depth and allow to dry for at least 4 hours before tiling commences.
  5. If you are unable to remove the old vinyl tiles, you can also level them with BAL Level Max, provided they are primed with BAL Bond SBR (undiluted ).This can then be tiled after 4 hours.

6. If the existing vinyl tiles are clean,solid and flat BAL Rapid-Flex One can be used direct onto the vinyl tiles without the use of a BAL Bond SBR.

If the floor is part of a wet room i.e. water via the shower head falls directly onto it, then it is essential to ensure that some form of waterproof tanking layer is in existance and located within the floor construction in order to prevent water penetration through the floor. We would recommend a product such as BAL Tank-it.

If you still require technical assistance, why not call our Technical Advisory Service on 03330 030160

Sticking with it – how adhesive technology has made tiling easier

Adhesive technology has come a long way from the traditional methods of sand and cement fixing – and boy has it needed to.

BAL TAD

Back in the 1960s it was recognised that adhesive technology was not keeping up to speed with the demands of new substrates and tile types and traditional fixing methods were becoming redundant.

To bring the industry up to date, the British Ceramic Tile Council set up Building Adhesives Ltd in 1962 to develop and manufacture a new range of high quality “new technology adhesives” backed by a comprehensive Technical Advisory Service.

The first products rolled off the line in February 1963 and in BAL’s first years, fixers welcomed the arrival of BAL TAD – its first ready-mixed adhesive – as well as the first BAL Grout.

Alongside research and development, BAL broke new ground by submitting products for independent evaluation by the CVRA (now CERAM). It set the standard for all future BAL products: rigorous pre-launch testing, then quality testing throughout production

The further development of substrate types, other system materials, the increase in porcelain and natural stone usage and development of large and extra-large format tiles, combined with site demands have meant the development of modern adhesives.

BAL has always been at the forefront of new fixing technology introducing industry-firsts such as the first epoxy grout, first tile adhesive using rubber crumb technology, first variable-setting tile adhesive, and first anti-bacterial grout.

To this day, BAL continues to develop innovative technology and products to respond to the changing habits of the UK tiling and flooring market. One such development is the introduction of Fibre Strand Technology, or FST.

First developed for BAL Max-Flex Fibre in August 2013, FST is one of the most significant innovations in the manufacture of powdered adhesives to hit the market in recent years and is now common-place throughout the industry.

Developed in conjunction with fixers and contractors, FST is the result of exhaustive investigation into the use of certain microfibres combined with high-quality, super-smooth, spherical fillers.

The microfibres deliver greater adhesion strength, grab and non-slip properties, bringing improved performance alongside extended open times. The improved consistency and smoothness mean the powders are easier to mix, and simpler and faster to trowel out and apply. The greater open times, achieved with no lengthening of drying times, enable much larger application areas, speeding up installation time.

BAL became the first adhesive manufacturer in the world to introduce FST into ready-mixed adhesives in August 2013 with the launch of BAL White Star Plus. It has also been into introduced into BAL’s all-in-one levelling compound BAL Level Max.

Following its introduction to the market, FST has been introduced into several rapid-setting tile adhesives including new BAL Rapid-Flex One which has an extended open time of 30 minutes and working time of 60 minutes – but is ready to grout after only three hours. This gives fixers all the speed and all the control, which two times longer working time and three times longer working time than most other rapidsets.

BAL has also been the forerunner of developing pourable adhesives such as new BAL Pourable One – which can be used up to 25 mm for large format and natural stone tiles – ensuring that the correct coverage has been achieved even with uncalibrated stones.

Rapid-setting in three hours and highly flexible, BAL Pourable One is ideal for underfloor and undertile heating, areas of total immersion and installations subject to limited movement and vibration. It can also be used for patch repair.

Both BAL Rapid-Flex One and BAL Pourable One offer a breakthrough in adhesive technology with a new white colour allowing it to be suitable for use on all tile types, yet available for the same price as a grey adhesive product.

What is the correct PPE when tiling?

It is highly important to wear the correct Personal Protective Equipment (PPE) when tiling on site or in someone’s home.

Tiling without PPE is leaving yourself open to acute injury or long-term health effects – which could stop you working in the short term, or end your tiling career completely.

First and foremost you need to protect your hands. Whilst tiling your hands are extremely vulnerable as you handle tiles, cutters, blades and tile adhesive and grout which can be hazardous and cause nasty cement burns if you’re not protected.

Wearing protective gloves provide barrier protection against cement-burns or adhesive irritation and can also provide extra grip when handling tiles – preventing any accidents.

Some specialist gloves on the market also provide abrasion and cut resistance, giving tiler reassurance when using a tile cutter or cutting instruments.

As well as protecting your hands, you should also ensure that you wear adequate eye protection. Your eyes are extremely vulnerable to a number of hazards when tiling, from splashes of adhesive or grout, or chips and shrapnel when cutting tiles.

Wearing a pair of wrap-around safety specs provides great protection from all directions – keeping you sight intact. There are a number of products on the market, including lightweight versions and those with anti-mist and ant-scratch lenses.

When mixing adhesive, grout or levelling compound, it may also be necessary to wear a dust mask to stop you breathing in harmful dust particles.

As well as a dust mask it is also worth investing in an extraction fan, or a device such as a whale tail – a special vacuum adapter which fits around a mixing bucket.

And finally, while they’re not a necessity, tilers might also want to invest in a good pair of kneepads. Knees are the most likely to be damaged in construction jobs. Too many hours kneeling on tiles and floors can cause long-term problems such as knee joint arthrosis – damage to the cartilage.

Kneepads must comply with EN 14404, which ensures that a particular model meets the minimum protection requirements. The level of benefits, the buffering capacity of the material and comfort are all important issues when choosing your kneepads.


Correct product selection is crucial for your perfect bathroom design

When selecting products for use in wet areas such as bathrooms, showers and of course wetrooms, it is vital to make the correct choices to avoid future problems and costly failures.

Hale Guest Ensuite stunning mosiac tiled wetroom in attic room 1

Ensuring that water sensitive or water resistant backgrounds in your wetroom, bathroom or shower installation are fully waterproof is perhaps the most important consideration because tiles, tile adhesive and tile grout on their own will not protect against water ingress through to porous materials.

This is outlined in the British Standards where it states that the use of a ceramic tile together with an impervious tile grout and tile adhesive are not a substitute for tanked or waterproofed substrates. The effects of water damage are well known and documented!

We would always recommend incorporating a suitable waterproof membrane onto non-waterproof substrates prior to tiling wet room installations. The substrate surfaces are always to be prepared correctly with the application in mind and prior to the ceramic or natural stone tiles being fixed.

Surface tanking membranes are ideal as they are specifically designed to stop water and prevent it from tracking through grout joints and affecting the substrates behind. This is why it is important to specify waterproofing on both walls and floors in wet areas

A tanking slurry, such as BAL Tank-it, can be specified to waterproof backgrounds prior to the typical installations involving tiles in wet areas i.e. showers, swimming pools etc.

A two-part product, BAL Tank-it has EN Classification BS EN 14891, this means it is suitable for internal and external waterproofing including terraces, balconies and even fountains, as well as saunas, hot tubs and spas.

Before tanking any background always ensure that it is flat, clean, dry, sound and free from barriers to adhesion. All falls in the floor should be designed to be between 1:35 and 1:80.

For example you may need your installer to render solid uneven walls first, or correct floor levels using a floor levelling compound such as BAL Level Max, ensuring SR1 surface regularity (3mm under 2m straight edge) as required by British Standards. The waterproof membrane should also be capable of working with the floor drain selected. This should always be checked first.

With some waterproofing products it may be necessary to also prime the background first (although this is not necessary with BAL Tank-it).

When selecting the right tile adhesive and tile grout for your wetroom, shower or bathroom, a number of factors need to be taken into account, including the substrate, tile size and type, and the environment.

Selecting the wrong adhesive or grout however could lead to disastrous and unsightly consequences including cracking or de-bonding of your tiles. This can result in remedial work, financial pain, intrusive repairs and on occasion recompense. Purely specifying an adhesive or grout based on its classification alone does not always guarantee success – as other factors may render the selection invalid.

Firstly let’s look at the substrate or background.  Whether the tiles will be going onto plasterboard, tile-backer boards, tongue & groove floorboards, sand: cement screeds or even existing tiles; there can be a significant differences between adhesive selections.

For example where floor coverings need to resist some limited movement or vibration, then a flexible/deformable adhesive and grout with equivalent flexible properties should be selected. Polymer modified adhesives and grouts have the addition of either powdered polymers, pre-blended at the manufacturing stage or can be modified with a liquid polymer additive.  This enhances the physical and mechanical properties of the product.

In a wet area the adhesive and grout must be capable of being exposed to dry and wet conditions. It should also be able to withstand thermal fluctuations – particularly if the assembly includes underfloor heating.

Other environments require provision of tiles and tile fixing products which are capable of withstanding demanding conditions during service such as:-

  • Supporting heavy weights/loads, where necessary.
  • Water and frost resistance.
  • Abrasion Resistance (for grouts particularly for power showers or Jacuzzis)
  • Withstanding exposure to cleaning and maintenance chemicals.

Tile type and size also plays a significant factor in determining your adhesive and grout. Ask yourself “are my chosen tiles porous?” are they glazed, fully vitrified, light-coloured/translucent or natural stone? Is the material you are using vulnerable to water-staining? Are you using large format or mosaic tiles and are they mesh-backed? Are the tiles slip resistant?

For example ready-mixed adhesives may be suitable for porous-bodied ceramic tiles, but for porcelain tiles a highly polymer-modified cementitious adhesive would be recommended. Ready-mixed adhesives are also not suitable for floor tiling or for tiles over 300x300mm.

Where light colours or translucent natural stone is to be installed; a rapid-setting and drying white cementitious adhesive is recommended in order to minimise any potential risks of water staining. A pourable thick bed adhesive may be required for floor tiling with large format tiling or uncalibrated natural materials.

There are other factors which should be considered and more importantly are NOT covered by the tile classification. Some of these include ease of use, coverage, colour, pot life, working or adjustment time and also cost.

As well as taking these factors into consideration, we would always recommend checking with your adhesive manufacturer to ensure that you have selected the correct adhesive and grout for your project.

BAL’s industry-renowned Technical Advisory Service are on call every week day from 8-5 pm and can provide NBS specifications, product support, project solutions and advice.

As the market-leaders for tiling solutions, BAL also has a nationwide team of Product Support Technicians who can provide on-site consultancy to your installers or designers.

To find out more about our services visit www.bal-adhesives.com


External tiling: solving the drainage problem

Did you know that it is estimated that more than 50% of coverings on balconies and terraces are damaged in Northern Europe due to poor installation systems?

grafik_ausblhungen-web-format


A lack of suitable drainage beneath ceramic, pavers and natural stone tiles fixed externally can cause a number of issues including cracked tiles, efflorescence, and stained or patchy tiles – all of which are derived from water damage.

Problems arise when water sits on tiles/pavers and cannot drain off the surface or sufficiently through the tiles, joints or screed. When there is nowhere for the water to go, it is trapped in the screed and rises to the tiled surface (this is called capillary active).

The solution to this problem is a capillary passive drainage system -surface water that is absorbed into the tiled substrate is drained away from the screed and completely removed.

The solution is provided through the patented drainage mats from Gutjahr System Technology, now available from BAL.

There are two drainage mats within the range, both providing market-leading benefits.

AquaDrain EK (the blue mat) has a mesh and is designed for use with most tile types on drainage mortar or epoxy drainage mortar. While the drainage mortar and epoxy screed is capillary active, allowing faster movement of water from the surface through the screed to the base, is the water is not removed it can rise again. That is why the EK mat system is needed to completely remove the water from the system.

pra_aqdrt_aqdrv_wafira

The green AquaDrain T+ has a specially designed fleece and is used with a direct point adhesion laying system for thin-layer, lightweight outdoor coverings.  With the AquaDrain T+, tiles are fixed at points on the surface drainage mat. There is no need for water-retaining mortar layers, and seepage water is rapidly shed through the mat’s drainage channels.

Both available in 8mm or 16mm depths for variable height build-ups and fast passive drainage, the innovative mats are designed with special meshes and fleeces, tailored to the specific requirements of the covering and laying method.  The patented “arch” shape guarantees the fleece/mesh does not sag and reduce drainage like some alternative mat systems.

Thanks to the unique arch system, and mesh/fleece which prevents the lime and mortar entering the cavities, the mats have more than 90% drainage volume – guaranteeing the fastest and best drainage volume in the market.

Alternative systems employ “dimples” where drainage capacity is much weaker, due to the sagging effective of the mesh into the drainage channels, blocking the flow of water. A 12mm alternate mat often performs lower than an 8mm AquaDrain mat!

Gutjahr drainage mats also have a 66% contact area on the channels, meaning an optimal load distribution, protecting the membrane from collapse.

Many specifications recommend uncoupling mats and not drainage mats for external tiling, but this causes problems of its own. Specifically that uncoupling mats only uncouple, and have no drainage capacity. Cavity mats are even more counter-productive as they retain water in their cavities and are capillary-active!

So it’s clear that simply fixing externally with just adhesive or drainage mortar/gravel will not prevent costly damage and the use of a drainage mat system is highly recommended.

At BAL we will be putting on specialist Gutjahr training sessions to show interested fixers and contractors the ropes. If you’re interested in signing up to a Gutjahr training session, please email training@bal-adhesives.com.

To find out more about Gutjahr System Technology, part of BAL External Tiling Solutions, please visit www.bal-adhesives.com/external-tiling/ and select your zone.


Don’t get hot under the collar when tiling to heated floors

With their popularity increasing by the year, heated floors are soon becoming the norm for tilers when starting on a job.

Floor-Screed-Commercial-Example1

Heated floors cause fluctuations in temperature which makes the screed, adhesive and tiles expand and contract. While the screed and adhesive expand at a similar rate, tiles have a lower coefficient of thermal expansion meaning they grow at a different rate. This can cause the tile to crack or debond due to the stresses placed at the interface between tile and adhesive.

To counter-act this potential for trouble, adequate preparation is crucial, as is the correct selection of adhesive and grout. Here we list the essential preparation for each type of system:

Hot water pipe system

If tiling onto a Hot Water Pipe system (usually incorporated into a reinforced mortar screed), ensure the screed has fully cured. This ranges from one week with BAL Quickset Cement to a minimum of three weeks for a screed containing OPC.

For anhydrite, hemihydrate or calcium sulphate screeds, extra drying time and screed preparation is required. It is advisable to contact BAL TAS directly when this is the case!

Following this period of curing, the screed may then gradually  heated up to a maximum operating water temperature of 45° as recommended by the heating manufacturer. It should be maintained at this level for three day, before allowing it to cool to room temperature.

Ensure that the heating system has been turned off, or on in cold temperatures, to ensure the screed is at 15°C before tiling commences.

Cable systems

When using cable systems, check with the manufacturer to ensure the system is compatible with the intended substrate and application areas i.e. wood, screed, kitchen, bathroom etc.

The cables should be bedded into a layer of self-smoothing compound such as BAL Level Max. When using BAL Rapid Mat or Flexbone uncoupling systems, the heating cables should be below the membrane and encased within the levelling compound.

Heating mats

Again check with the manufacturer that the chosen system is compatible with the substrate and to the environment it is being used in.

Before tiling, the surface of the mat should be primed using a contact adhesive, prior to the installation of tiles using the correct adhesive – which we will come onto.

Movement joints

Movement joints and control joints should be incorporated at all perimeters of the screed, including upstands or anything which penetrates the screed, such as columns or pillars. Movement joints are usually formed whilst the screed is being laid. It essential that movement control joints penetrate the full depth of the screed to the insulation layer.

Once tiling commences, movement joints should be incorporated to coincide those in the screed. For floors subject to thermal changes, such as under floor heating, floor area should be divided up by movement joints into bays of size, not greater than 25m2 with and edge length of not greater than 5m. When using uncoupling systems, the bay size can be increased to 40m² and edge length no greater than 8m².

If using BAL Rapid-Mat or BAL Flexbone,  the mats should be separated where intermediate movement joints penetrate through the thickness of the tile and bed down to the membrane place on top of the reinforced base screed.

Suitable adhesives

When tiling onto concrete or cement:sand screeds or plywood overlaid floors (min thickness 15mm), a flexible adhesive is required to counteract any thermal movement.

Suitable adhesives include: BAL Single Part Flexible, BAL Flex One, BAL Rapid Flex One, BAL Pourable One, BAL Max Flex Fibre.

For single layers of timber, or where plywood overlay is less than 15mm, consider the use of BAL Rapid Mat uncoupling mat or BAL Flexbone VAried and a flexible adhesive, or BAL Single Part FastFlex– a specialist rubber-crumb adhesive with advanced flexibility.

Suitable Grout

As with your adhesive choice, your chosen grout should also be flexible to allow for thermal movement. Recommended BAL grouts include: BAL Superflex Wide Joint Grout or BAL Micromax2 (BAL Micromax2 with BAL Admix GT1 diluted 1:2 by volume with water when tiling onto single layers of timber when using BAL Single Part FastFlex as the adhesive or when plywood overlay is less then 15mm).


Due to the large number of heating system on the market, we would also recommend to contact BAL Technical and Advisory Service (TAS) for advice before any work is carried out!

Fail-safe tiling onto anhydrite screeds

Easy to lay, low cost, fast-drying, pumpable and self-levelling, anhydrite screeds or calcium sulfate have grown in popularity over the last decade for new builds and renovations/extensions.

Approved%20Anhydrite%20Screeds

However despite the numerous benefits associated with laying an anhydrite screed, fixers need to be aware of the many potential pitfalls and problems when tiling.

The main issue with anhydrite screeds concerns moisture content and associated drying times. Because anhydrite screeds have a higher moisture content and dry through a chemical reaction followed by evaporation which drastically increases the time it takes for the screed to reach  no more than 75% relative humidity (r/H %) or 0.5 Water by Weight (w/w) as required by British Standards.

When fast-track tiling is required consider the use of a Damp Proof Membrane such as BAL DPM. BAL DPM can be used on anhydrite screeds up to 87% RH.

Because of this need to reduce the moisture content, the drying time for anhydrite screeds is approximately 1mm per day up to 40mmin ideal drying conditions i.e. air temperature of 20C with a relative humidity not greater than 65%. Drying times will significantly increase for thicker screeds or those in poor drying conditions.

This means a typical anhydrite screed dries in about 49 days. Compare this to an OPC (Ordinary Portland Cement) screed which is dry in around 21 days, or even BAL QUICKSET CEMENT which dries within 4 – 48 hours, then you see where issues may occur.

Before tiling onto anhydrite always test the moisture content using a Hair Hygrometer (tests r/H%) or Carbide Bomb Testing (w/w).

Accelerated drying of anhydrite screeds may be used once the screed is at least 7 days old. It is at this point that we would recommend commissioning any underfloor heating. The system should be increased by approximately 5°C per day until the maximum required working temperature is reached or as per the underfloor heating manufacturer’s recommendations. This should be maintained for a minimum of one week, before being gradually reduced to around 15-20°C.

Another common cause of failure when tiling onto anhydrite screeds is Ettringite formation.  This occurs when the cement in a tile adhesive reacts with the gypsum in the anhydrite screed, forming mineral crystals at the interface which can cause debonding.

To combat the formation of Ettringite, ensure that the surface is dry and seal with an appropriate BAL prime. Priming creates an effective barrier and assists in making the surface more stable. Contact BAL TECHNICAL ADVISORY SERVICE (TAS) for further information on dilution ratios.

As anhydrite cures, a weak layer of laitance is formed at the surface. This laitance is too weak to tile too and will also slow the drying process.

Laitance should be removed by light abrasion using a suitable sanding machine i.e. a rotary floor scarifier and a 60’s grit sandpaper. Remove excess dust completely with a vacuum cleaner. Abrading the surface is best carried out 4-6 days after the application of the screed and can assist in the drying out process; this will be done by the screeder. Once the screed is dry, the surface must be scarified again by the tile fixer to remove laitance and any surface contamination. Scarifying the surface is even recommended with low laitance Calcium Sulfate/anhydrite screeds as this further aids adhesion.

All traffic should be kept off the screed until it has hardened sufficiently in accordance with the screed manufacturer’s instructions and should always be protected from contamination and damage from other trades. Once the screed is fully dry and before tiling commences it is best to protect the screed fully by using boarding.

When selecting your tile adhesive, consideration should be given to tile type and application. Consider the impact of water penetration into the substrate. Flexible Slow or rapid-setting tile adhesives can be used, depending on the tile type and environment.

When the adhesive is cured, the joints between the tiles should be filled with a suitable flexible grout – a minimum of 3mm is usually recommended for grout joints and movement joints must always be considered, using a profile movement joint or silicone sealant such as BAL Micromax Sealant (which can be colour-matched with BAL Micromax2 grouts). For further information regarding preparation, adhesives, grouts and movement joints please contact BAL TAS.

*This is not a technical guide, always follow the manufacturer’s guidance and contact BAL TAS.


Don’t let your installation be a damp squib – waterproof your background correctly!

Ensuring your wetroom, bathroom or shower installation is fully waterproof is crucial part of any tiler’s work, because tiles and grout on their own will not inherently protect against water damage.

Thankfully BAL has launched a new waterproofing system – BAL Tank-it – which is specially designed to include everything required to allow tilers to waterproof internal or external areas, such as swimming pools, spas, hot tubs, terraces, balconies and even fountains in a quick, easy and simple way.

A two-part product with 5kg powder, 5ltr liquid and 20m scrim tape (each sold separately), BAL Tank-it fully waterproofs the background behind the tiles to prevent water penetration and covers approximately 7m2 at 1mm thick.

As a result the kit prevents water saturating the whole area, reducing the risk of unsightly black mould forming, and drastically reducing the risk of more serious issues such as floor collapse and other surfaces vulnerable to corrosion.

Applying BAL Tank-it is incredibly easy – especially as no priming is needed unlike other waterproofing kits on the market. Simply apply the scrim tape to corners, junctions, penetration points and cracks in the substrate, then mix the powder and liquid as per packaging instructions and apply using a standard 4mm notched trowel and float, brush or roller.

What makes BAL Tank-it stand out is its rapid-setting nature. Thanks to its unique formulation, it can be tiled after only 90 minutes – making one-day installation a real possibility!

As well as providing ultimate all-round performance, ultimate workability and ultimate versatility, BAL Tank-it comes with a complete 25 year guarantee when used as part of a full BAL system solution providing market-leading peace of mind on all installations.

Don’t forget that all BAL users can rely on us for complete project support. No other brand can offer so much experience and expertise including free technical advice, free on-site consultancy, free training and free specification service.

Tiling onto wood is easier than you think

One question I’m always asked if whether you can tile onto timber floors. Well the simple answer is yes, provided they are capable of carrying the additional loads and are sufficiently rigid and stable.

Tiling onto wood

If you don’t feel the that floor is strong enough, you can always fit extra noggins between the joists, or overboard with a tile backer board such as 6mm or 12mm BAL Board, or 15mm marine grade plywood, screwed down at 300mm centres ensuring screw heads are flush with the surface.

If the floor needs to be “made good”, i.e. levelled then it may be possible to use a levelling compound such BAL Level Max, which is suitable over timber at only 3mm, you must first prime the surface of the timber with two coats of neat BAL Prime APD, allow to dry between coats and best practice to apply 90° to the first coat

When tiling onto plywood overlaid timber then we recommend using a flexible adhesive such as BAL Rapid-Flex One, BAL Flex One or BAL Max Flex Fibre for example for speed on the job or when fixing larger format ceramics/stone, BAL Pourable One would be the ideal product

If you’re tiling direct onto a stable tongue and groove floorboard, then prime the surface with two neat coat BAL Prime APD in the same way, before using a highly flexible tile adhesive such as BAL Single Part Fastflex – ideally at 3-4mm. Alternatively you could try installing an uncoupling system like BAL Rapid-Mat  or BAL Flexbone VAried using BAL Rapid-Flex One. Note BAL Single Part Fastflex is NOT recommended to be used with BAL Rapid-Mat.

Cutting-edge, BAL Rapid-Mat is less than 1mm thick and works as a buffer layer to protect against the different rates of lateral movement in the timber and tiles surface which can cause tiles to crack or de-bond. BAL Flexbone VAried is a cavity mat system that also provides a waterproof membrane as well as uncoupling properties.

When grouting tiles laid over timber you should make the same considerations when choosing your grout as you do when choosing your adhesive.

That is to say, consider the need for flexibility to cope with the additional movement faced when tiling onto timber.

At BAL we would recommend a product like BAL Micromax2, which has extra flexibility that can compensate for the lateral movement. Alternatively consider BAL Wide Joint Grout with BAL Admix GT1 pre-diluted 1:1 with water, or BAL Micromax2 with BAL Admix GT1 pre-diluted 1:2 by volume with water when used with BAL Single Part Fastflex.

For further information or advice on tiling onto timber, contact BAL Technical Advisory and Specification Service

A Guide to Priming

“When do I need to prime?” “How many coats do I need?” are questions I’m often asked.

prime APD

Priming can be an absolute minefield, but by following some simple rules it couldn’t be easier.

Before tiling, certain wall and floor backgrounds must be primed for a number of reasons including; to reduce porosity (absorbency) of backgrounds or bases (preventing the formation of air bubbles), to minimise risk of chemical reaction with cement-based adhesives and to add surface strength to friable (weak) surfaces.

Priming also helps prepare surfaces for waterproofing, or for preparing surfaces prior to the use of a levelling compound.

The following key substrates/backgrounds should be primed using BAL Prime APD, two coats neat – gypsum plaster (if using cementitious adhesive) and tongue and groove floorboards. Gypsum plaster can also be primed using BAL Bond SBR diluted 1:2 with water when using cement-based adhesives, or 1:4 if using BAL ready-mixed adhesives. If priming gypsum plaster before using ready-mixed products, BAL Prime APD can be used diluted 1:1 with clean water in one coat.

One to two coats of BAL Prime APD should be used for lightweight blockwork, and two coats (first coat diluted 1:1, second coat neat) for calcium sulphate or anhydrite screeds.

If required, i.e. the surface is dusty or friable, you may also want to consider priming cement:sand render, concrete and cement:sand screeds with one coat of BAL Prime APD to give the surface you are tiling to more strength.

BAL Bond SBR is also a useful product as a primer and can be used to prime the edges (but NOT the surface to be tiled onto) of the following backgrounds:

·         Lightweight tile backer boards

·         Calcium silicate boards

·         Plasterboard

Remember to always seek further advice/guidance from board manufacturers.

If tiling on fibre-reinforced cement sheets, or plywood/chipboard, then we would always recommend priming the reverse side and edges with BAL Bond SBR. This helps protect the plywood from moisture penetration which could cause the board to swell.

When priming with two coats, it’s always good practice to apply the second coat at 90° angle to the first coat, with the one coat horizontally and one coat vertically (always allow each coat to dry). This ensures complete coverage of the background.

If you’re unsure whether to prime or not, it’s always worth your time consulting our Technical Advisory Service.

DOWNLOAD PRIMING GUIDE

Screed if you want to go faster

If you don’t want to tile to bumpy surfaces then you need a decent surface on the floor screed. But what exactly is a screed?

Floor-Screed-Commercial-Example1

By definition, a screed is l “a layer or layers of screed material laid in situ, directly onto a base, bonded or unbonded, or onto an intermediate layer or insulating layer, to obtain one or more of the following purposes:

To obtain a defined level
To carry the final floor covering
To provide a wearing surface”

For tiling this is simply a floor covering designed to provide a hard-wearing, permanent  and smooth surface.

Screeds come in a number of materials from traditional sand:cement, which can be fast-tracking (for example by using BAL Quickset Cement), calcium sulphate/gypsum screeds and Lime-based screeds,  to smoothing and levelling compounds such as BAL Level Max.

Applied to a mature concrete base or slab (at least 6 weeks old), screeds can come in a number of forms including bonded, un-bonded, floating and heated – all of which can be modified. Alternatively apply a suitable smoothing and levelling compound. Modifying can improve the property of the screed for example reducing shrinkage or  to improve strength. Less shrinkage reducing the chances of curling, and improved physical and mechanical strength can reduce the minimum thickness applied for certain applications.

Bonded screeds are typically mixed in a forced action mechanical mixer at different ratios of cement to sand with water,  dependent upon the strength required. They can be modified with a product such as BAL Bond SBR, typically 5-10 litres of BAL BOND SBR for every 50 kg of  cement mixed

Un-bonded (modified) screeds are typically applied over a damp proof membrane (dpm) laid over a concrete base. Minimum thickness should be 50mm at any point, designed to a thickness of 70mm. They must be cured initially as rapid drying may increase the risk of  curling.

It is recommended to cover the screed with a polythene sheet in the first week initially before allowing to dry further in air. This is to avoid rapid drying out which may cause shrinkage cracks and also increases the risk of curling.

Floating screeds are usually applied over a thermal and acoustic layer on top of a base , for example insulation materials. When applying a floating screed it is essential to include a steel mesh to reduce the risk of cracking.

Heated screeds are applied over a wet or electric heating system on top of a thermal insulation layer over concrete. Reinforcement is achieved by steel mesh laid just above the heating system. Adding fibres in the screed mix can help to minimises early shrinkage cracking and improve flexural strength. It is important to remember that heated screeds need to be commissioned correctly before any tiling is commenced.

Levelling screeds, such as BAL Level Max, are laid to achieve SR1 surface regularity – that is under 2m straight edge with a gap no greater than 3mm. This is required for the application of ceramic tiles, using a suitable tile adhesive.

Fast track screeds, such as BAL Quickset Cement, are a good substitute for traditional Ordinary Portland Cement (OPC) and can be used for all types of cement:sand screeds.

When laying the screed ensure that it’s mixed to the right consistency i.e. for semi-dry consistency –squeeze the mix in a gloved hand  to check that it retains its shape but does not crumble.  Apply the screed using a float, or pumping machine to a battened area, and level using a screed bar drawn across the surface. Tamp down using a screed float and finish using a wooden float.  Once laid, allow at least three weeks to cure when using traditional OPC, at least 4 hours (bonded screeds) or 48 hours (unbonded and floating screeds) when using BAL Quickset Cement  – .Drying times  can vary with thickness andambient conditions on site. For calcium sulfate screeds the drying time is approximately 1mm per day up tp 40mm in ideal drying conditions, but requires additional drying time for screeds above 40mm. Boards should also be used to protect the screed from traffic and contamination.

Before tiling a primer may be recommended for the prepared screed surface before application of the tile adhesive. Priming creates an effective barrier and assists in making the surface more stable.

When selecting your tile adhesive, consideration should be given to factors such as the tile type, and the type and method of cleaning of the floor whilst in service – i.e. how wet the finished floor may become and what are the risks associated with limited water penetration. Slow or rapid-setting tile adhesives can be used, dependent upon the tile type and environment.

When the adhesive is set, the joints between the tiles should be filled with a suitable grout – please note that a minimum of 3mm for floor tiling is recommended.

I hope this blog gives you a good initial guide to screeding and the techniques required.

If you are interested in finding out more about screeding and screeding techniques, why not sign up to our Screeding Masterclass. To find out more about our range of courses click here.

Dave’s Training Blog

Welcome to my first monthly training blog on BAL’s fantastic new website – designed to give trainee fixers and college tutors comprehensive support and tools.

BAL Demo

Firstly, let me introduce myself.  I’m Dave Rowley, Training Manager at BAL with responsibility for internal training at our new Innovation and Technology Centre and supporting  training at colleges across the country.

I have more than 23 years’ experience in tiling, having joined the industry upon leaving school and gaining a City & Guilds Advanced Craft qualification through an apprenticeship at Hamil Tiles.

I joined BAL in 1992, and have been training manager since 2000. I’m also Chairman of the TTA Supply Chain Committee, an active member of the TTA Fixer Training Committee and a Lead Judge for Wall and Floor Tiling for SkillBuild – the national construction skills competition.

Training is extremely important to me, as I believe it is key to the continued success of the tiling industry. For me it is crucial to ensure that workmanship remains at a high level throughout the tiling industry – and that tile fixers, tutors, tiling contractors, specifiers and tile retailers have up-to-date product knowledge and technical expertise to be able to adapt to changing trends, tile materials, tile fixing products, backgrounds and environments.

If bad practices start to happen, this will result in tiles not being used and other materials being specified instead resulting in the loss of work for all in the industry.

At BAL we have invested significantly in training – especially with the development of our new Innovation and Technology Centre (ITC). Opened in March 2015, our ITC leads the field in training and innovation – providing a purpose built facility including a state-of-the art 40-seat demonstration auditorium, practical training bays, meeting rooms and more.

We encourage tutors to bring their students down to the facility in Stoke-on-Trent to take part in bespoke hands-on wall and floor tiling courses, visit our factory and tour our research and Quality Control laboratories.

As well as in-house support, we can also bring training to your college through our extensive nationwide network of Product Support Technicians.

Supporting our training structure is this fantastic new online digital resource where tutors and students can access a range of training guides, literature and point of sale material.

What’s more, we’re giving students the chance to get on the jobs ladder with our fantastic, innovative Apprenticeship Tool connecting students looking for apprenticeships with tiling contractors searching for apprentices. Simply post your details upload your CV and for potential employees to view.

Regularly updated with fresh content and information, we hope this website will become your first port of call when looking for wall and floor tiling training information. So get exploring today, and please let us know your thoughts!

I will focus on discussing the latest trends and hot topics in training in my blog, but if you have any topics you think would be good to discuss, please let us know using the below contact form.

Thanks,

Dave

Error: Contact form not found.