Creating the perfect look with BAL Micromax2

Choosing the right grout for your tiling project is as important as selecting the tile itself and if overlooked, it can mean your tiling doesn’t look how you imagined.

Selecting your grout

When selecting your tile grout, it’s not only “good looks” that matter – it’s also substance.  Grouts need to look perfect, but also be robust, durable, and suitable for your specific installation, which is why it is crucial to choose a grout you can trust to ensure your tiling looks great for years to come.

There are a number of factors to take into consideration including the size of the tile joint, the application (power shower, splashback, etc) and any other specific features required e.g. antibacterial, hygienic/sterile or chemical resistant, which will all determine which product to select.

For many, including some professional tilers, grout selection has been a minefield for years. Among the greater challenges has been the need to ensure that the shade of grout used on wall tiling matches that used on the floor in the same room or area. This has been problematic because floor tiling typically has much wider gaps than wall tiling, requiring that different products be specified.

This all changed with the introduction of BAL Micromax2.

Highly engineered for perfect results

Developed as a result of extensive R&D carried out in collaboration with tilers nationwide, BAL Micromax2 offers a combination of previously unseen properties to make it ideal for virtually any wall or floor installation.

Its versatility removes the need for different grouts within a single installation: as BAL Micromax2 suits both the floors and the walls. Its superfine formulation, giving a finish of striking smoothness, enables use with gaps as narrow as 1 mm. Its strength and flexibility, however, allows grouting of gaps as wide as 20 mm, with no slumping, shrinking and cracking.

As for tile types and backgrounds, BAL Micromax2 suits any type of tile, including porcelain and natural stone, on any type of background. It is ideal for dry and wet areas, indoors and outside, and can even be used with underfloor heating systems and for plywood overlay floors.

Consistent colour tones and anti-bacterial protection

BAL Micromax2 is available in 9 colours – Snow, White, Manilla, Jasmine, Pebble, Gunmetal, Smoke, Ebony, and Anthracite – and its technologically enhanced formulation ensures enduring good looks and a consistent colour with no efflorescence. This is because its formula does not include Ordinary Portland Cement – which is full of efflorescence-producing salts.

With BAL Micromax2 there is no patchiness or shading, even across the largest areas. What’s more, the incorporation of Microban anti-bacterial protection inhibits the growth of black mould and harmful bacteria such as E.coli, Salmonella and Listeria.

This makes it ideal for applications in bathrooms and kitchens where significant levels of moisture are likely to be commonplace, and where it’s especially important to protect against harmful bacteria where food may be prepared and consumed.

Save time and cost on your tiling project

Tilers and homeowners will welcome the unusually long 30-minute working time, which enables a larger area to be grouted with a single mix. This produces time and cost savings, while further economies come from its fast setting properties.

As little as two to three hours’ drying is needed before a floor will bear light traffic, removing project delays and facilitating faster job completion. Clean-down is easy, with no tile haze, while the unusual smoothness also removes the chance of tile abrasion.

Lifetime guarantee and full product support

As well as top product performance, tilers and homeowners can enjoy the benefits of BAL’s 25-year written guarantee, on and off-site project support and technical advice from BAL experts giving you peace of mind that your projects will last the test of time. To speak to our Technical Advisory Service call 0845 600 122, or visit www.bal-adhesives.com.


Tiling with Resin-Agglomerated and Mesh Backed Tiles

What is a Resin Agglomerated Stone?

Resin agglomerated tiles have become an increasingly popular choice of floor finishes over the last 20 years, as they offer a cost effective alternative to natural stone. These tiles are manufactured in an array of colours and are ‘engineered’ to have some improved mechanical and physical properties such as scratch resistance and flexural strength. Resin agglomerated tiles are sometimes called reconstituted or re-composed stone and in the US are known as Engineered Stone.

A resin agglomerate stone tile is a composite material, based upon the use of recycled natural stone aggregates or stone pieces which are then bound together at the manufacturing stage using a synthetic resin. The resin bound stone is then formed by vibration and compression under a vacuum to form large blocks. These blocks are then allowed to cure before being sawn into slabs, calibrated to the correct size and thickness, polished, then accurately cut into the required tile sizes.

The agglomerated stone to resin binder ratio has a direct affect upon the physical, mechanical and performance properties of the tiles. For example, use of quartz or granite agglomerates produce in general a harder wearing tile with increased resistance to acidic chemicals when compared with those based on marble agglomerates. Two main types of polymer resin binder are used in the tile manufacture and these are either epoxide or polyester.  Typically the ratio of resin binder to agglomerates varies from 5% to 7% (with 95% to 93% Agglomerate). The higher the percentage of resin present; then the greater the abrasion resistance is reduced. This is especially evident with increases in the Coefficient of Thermal Expansion of the tile.

Thermal Movement

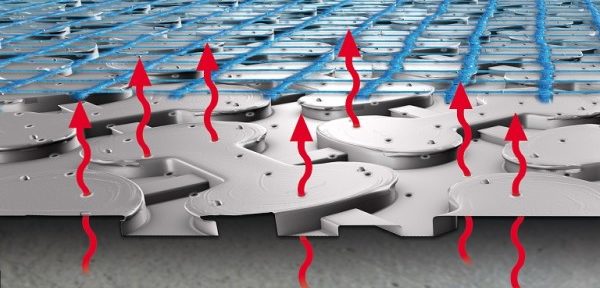
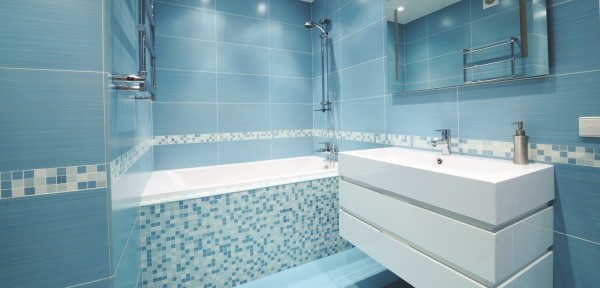
The use of underfloor heating or undertile heating is increasingly popular as a heating choice within the UK. It can often provide cost effective, comfortable and unobtrusive heating. When considering a rigid tile finish, either directly onto a heat source or in areas where thermal gradients exist i.e. areas subjected to direct sunlight. It is important to understand how the heat change affects the different materials employed within the tiling assembly.

Materials may undergo dimensional changes when subjected to heat fluctuation. This is known as the Coefficient of Thermal Expansion. When considering the tile, the tile adhesive and the substrate, the Coefficient of Thermal Expansion for a typical constructional sub-floor such as concrete or cement; sand screed is similar to a cementitious based tile adhesive. However a resin agglomerated stone tile has a higher Coefficient of Thermal Expansion in comparison. In simple terms the tile has a high modulus of rupture, or measure of strength before rupture, and is being ‘restrained’ by the tile adhesive. However due to heating and cooling cycles, a relatively small amount of heat expansion and contraction can exert a high level of stress on the restraining layer i.e. the tile adhesive. The larger the tile dimensions, the greater the magnitude of the dimensional changes on resin agglomerated stone caused by the thermal expansion or temperature increases.

Moisture Movement

It is important to note that resin agglomerated stone tiles do have varying degrees of moisture sensitivity which means that these tiles can be susceptible to differential moisture expansion. This can often lead to a potential ‘curling’ of the tiles. The Tile Association (TTA) technical document on Tiling with Resin Agglomerated Tiles recommends that:

Cementitious floor screeds to receive resin agglomerated tiles should be completely cured and tested to ensure that they have a moisture content of not more than 2% by weight or 75% relative humidity using the appropriate test equipment and also that an appropriate adhesive is chosen” (Clause 3.5 Moisture Sensitivity).

Simply put, the use of a cementitious based tile adhesive or screed will introduce moisture directly beneath the resin agglomerated stone tile which may be taken up slowly by the tile. Some loss of moisture will occur whilst the tile joints remain unfilled; however this process will be slower. The tiles are available in various size formats including large formats (i.e. with one edge length 600mm or greater) up to typically 1200mm x 1200mm. The larger the tile in size, the more likely that moisture will become trapped at the tile/adhesive interface. In the case of some resin agglomerated tiles, this will increase the risk of curling of the tiles away from the tile adhesive bed. Therefore the correct selection of tile adhesive is essential.

For this reason, resin agglomerated tiles are not recommended for use infrequently wet areas e.g. areas of total immersion such as swimming pools or pool area walls and floors.

 Adhesive Selection

Resin agglomerated tiles are classed as neither ceramic nor strictly speaking a natural stone, being as previously discussed as a ‘manufactured’ or ‘engineered’ stone tile.

However, British standards code of practice BS 5385: Part 5: 2009 and floor tiling Design and installation of terrazzo, natural stone and agglomerated stone tile and slab flooring – Code of Practice offers the following recommendations in clause 11.2.1 of BS 5385::Part 3 2014: “To avoid moisture from the adhesive bed distorting resin-based agglomerated stone, reaction resin adhesives, or quick drying low alkalinity cement-based adhesives should be used”.

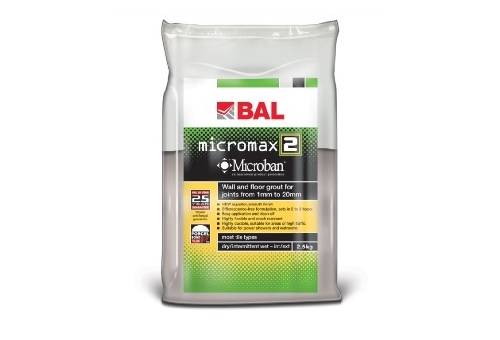
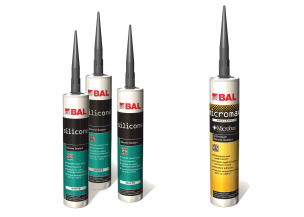
BAL manufacture suitable rapid drying, low alkalinity tile adhesives. Dependent upon the background substrate to which the tiles will be fixed, BAL POURABLE ONE mixed with BAL ADMIX AD1 may be used for floors or BAL RAPID FLEX ONE with BAL ADMIX AD1 for walls. Where the resin agglomerate stone is especially moisture sensitive use of a suitable reaction resin tile adhesive i.e. BAL EASYPOXY AG may be specified.

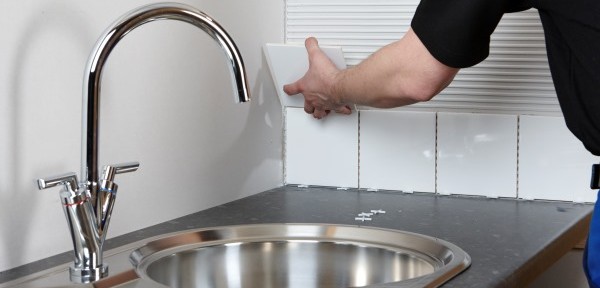
Adhesive Application

When installing a ceramic tile or natural stone tile using a tile adhesive, the accuracy of a sub-floor should be such that when placing a 2 metre straightedge on the floor that there is no gap greater than 3 mm. This is known in BS 5385 Part 3 2014 as SR1 (Surface Regularity).

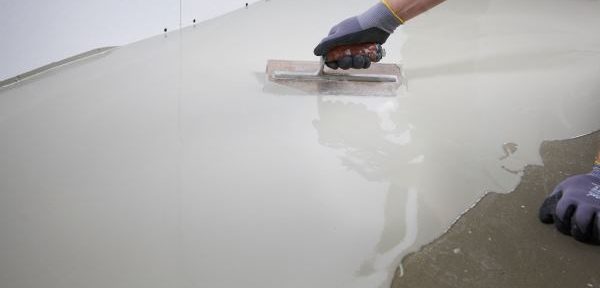
If this is not the case, this may be rectified by the use of a suitable smoothing and levelling compound such as BAL LEVEL MAX, dependent upon the type of floor construction.

In the case of the installation of large format tiles, in particular resin agglomerated stone tiles, the surface regularity should be SR1 or better for both wall and floor substrates.

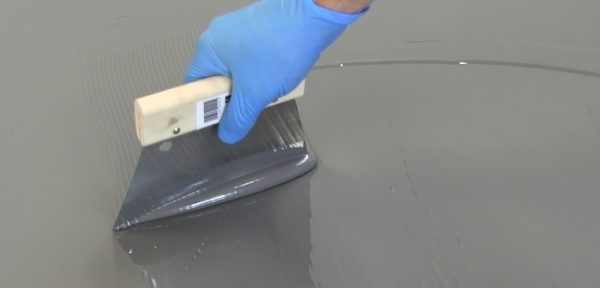
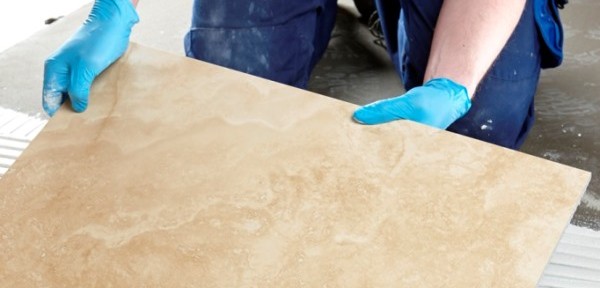
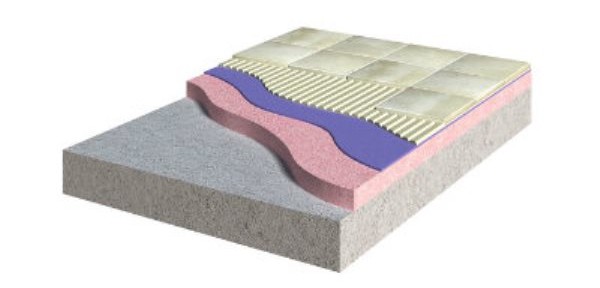
The tile adhesive should be applied using a suitable notched trowel to the wall or floor and in the case of large format tiles, additional back buttering of the tile with the tile adhesive may be required to ensure adequate adhesive coverage.

When fixing resin agglomerate tiles to both walls and floors solid bed fixing is essential to;

  1. Ensure, as far as is practicable, full contact is achieved between the tile adhesive and the wall or floor tiles,
  2. Eliminate voids beneath the tiles, which in floors are potential points of weakness under load and in wet areas, moisture may become trapped from the service conditions on site or during regular cleaning.

Environmental Consideration

As previously discussed, resin agglomerated tiles are not recommended for use in frequently wet areas e.g. areas of total immersion such as swimming pools or pool area walls and floors.

For domestic showers and wet rooms, generally it is important to seek further advice from the tile supplier or manufacturer with respect to their fitness for purposes in these applications. It is also important to establish what, if any, additional precautions may be necessary to take both during and following completion of the tiling installation. Fundamentally the wall and floor should be protected from moisture ingress/ leaks using a suitable waterproofing tanking system such as BAL TANK-IT.

Additional protection from potential water ingress may be afforded by the use of a suitable impervious reaction resin grout such as BAL EASYPOXY AG or BAL FLOOR EPOXY. However, as stated in BS 5385-Part 4: 2015: “The use of impervious grouts and adhesives is no substitute for a tanked installation” (clause 7.2.3 Installations not immersed but subject to occasional wetting, note 2).

It is also important to note that the fixing of resin agglomerate stone tiles is not recommended for external tiling using a tile adhesive. Where the tile is deemed to be suitable for use for external application by the supplier or manufacturer, for external facades they should always be installed using appropriate mechanical fixings.

The Importance of Movement Joints

The need for inclusion of movement control joints within any tiled installation is well documented in the BS 5385: Parts 1-5 suite of standards. Fundamentally movement from factors such as drying shrinkage movement, thermal and moisture movement (as discussed previously) will generate stresses within the tiling system which can lead to de-bonding or cracking of the grouting and/or tiles.

Where the resin agglomerate tile is deemed to be suitable for floors subjected to direct heat or heat from an environmental source, The Tile Association technical document Tiling with Resin Agglomerated Tiles recommends the frequency of movement joints needs to be increased. For example, BS 5385-3 advises that for floors subjected to significant thermal changes, tiles should be divided into bays of size not greater than 40m² with an edge length not greater than 8m. In order to allow for the anticipated increase in thermal expansion of the resin agglomerated tile installation, the bays of size of the movement not greater than 25m² with an edge length not greater than 6m.

Under normal dry internal conditions, the advice is that bay sized should be reduced to bay sizes not exceeding 36m² (100m² bays for ceramic tiles).

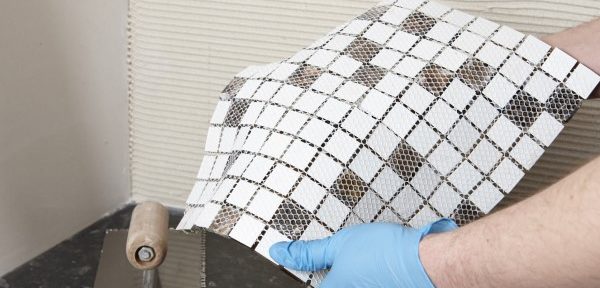
Mesh Reinforced Resin Backed Tiles

There has been an increase in recent years in the number of natural stone tiles i.e. marble or granite imported into the UK which has a mesh reinforced resin backing bonded to the lower interface of the stone.

Typically the resin polymers commonly used for this are epoxide, polyurethane or polyester of which polyester is the most commonly used. A fibre mesh is often embedded within the resin coating i.e. a fibreglass mesh.

The reasons for this vary from providing additional strength to the stone, particularly in the case of thin marble, limestone or granite, or sometimes it may be designed as a ‘temporary’ backing.

Unfortunately a polyester resin will have a much higher Coefficient of Thermal Expansion compared with the stone itself. Coupled with the surface of the resin which has a ‘waxy surface’ and may contain free styrene monomer, these will act as barriers to adhesion.

When fixing these mesh reinforced resin backed stone tiles, the bond strength achieved is totally dependent upon the quality and consistency of the resin/ mesh backing applied to the stone. This applies to both the dry and wet duty test conditions.

Factors which influence this are, for example;

  1. The tensile bond strength between the mesh reinforced resin backing and the stone, which can vary from strong to very weak.
  2. The chemical type of resin used e.g. polyester resin has a high coefficient of thermal expansion when compared with different types of stone and differing backgrounds/base.
  3. Variability in the quality and application of the mesh and resin between the same stone i.e. where mesh is not completely encapsulated in the resin or when the mesh is weakly bonded to the resin itself.

However the most fundamental factor when considering the feasibility of the use of a cementitious based tile adhesive conforming to the requirements of BS EN 12004: 2007 + A1: 2012 is that the tile adhesive is no longer bonding directly to the stone but to an intermediary (and potentially weaker) layer which has been introduced between the stone and the tile adhesive.

As an alternative to cementitious tile adhesives, reaction resin adhesives conforming to BS EN 12004: 2007 + A1 2012, could also be considered. However the use of a resin based i.e. an epoxide tile adhesive would prove to be very difficult, particularly where elevated temperatures may exist on site. In addition the amount of restraint offered to the mesh reinforced resin backed stone may counter-act against the anticipated levels of movement within any tiling installation, in particular where, for example any thermal and moisture movement is prevalent.

BS 8000: Part 11 Workmanship on building sites Part 11: Internal and external wall and floor tiling – Ceramic and agglomerated stone tiles, natural stone and terrazzo tiles and slabs, and mosaics – Code of Practice recommends that: “With large tiles and slabs any reinforcing mesh should be well adhered to the underside, and the mesh and adhesive should not obscure more than 25% of the underside of the tile or slab unless they are mechanically fixed”.

This advice mirrors that previous recognition is given for mesh backed mosaics which adhesives that the combination of mesh and glue holding the mesh in place should;

  1. Not cover more than 25% of the back of the tesserae
  2. Be no deterioration in the backing material and its glue whilst in service
  3. Be compatible with a cementitious tile adhesive in accordance with mosaic suppliers’ recommendations.

In conclusion, where a mesh reinforced resin backed stone is specified, unless the tile adhesive is able to bond directly to the stone to produce a contact area of 75% or more, it may be possible to consider removing the mesh reinforced resin backing altogether, but this must be undertaken following consultation with the stone supplier or manufacturer.

If this is not feasible to remove the backing without damaging the integrity of the stone, then consideration should be given to mechanically fixing. In the case of external wall cladding, BS 5385: Part 2 2015 advises that “Stone tiles which are resin mesh backed should not be used”.


Saving time and money with BAL Flexbone

When specifying floor tiling, products that save time and ensure the project is fail-safe are always valued.

Providing fast-track project completion and protection against lateral movement, new BAL Flexbone uncoupling solutions provide architects and designers with all the answers.

Uncoupling mats provide a protective layer between substrates which have the potential to contract or expand such as concrete, sand and cement, anhydrite (calcium sulphate) screeds or heated screeds.

Failure to protect against this lateral movement can cause tiles to either fracture, or de-bond from the background.

Following the launch of the award-winning BAL Rapid-Mat in 2014, the Flexbone range offers two very different solutions to the UK market with the launch of Flexbone 2Easy and Flexbone VAried.

Unique to the UK, BAL Flexbone 2Easy is a floating mat system – this means that no adhesive is required underneath the mat i.e. the mat is truly uncoupled!

Because no adhesive is required, as long as the floors are level and solid, preparation of the substrate is reduced to a quick sweep of the floor. No removal or residue, no removal of laitance and no priming of the surface is needed. This means that contaminated and stained floors, wooden floors, cracked screeds and mixed substrates can be tiled immediately.

As well as time savings from the lack of preparation, materials costs are also significantly reduced with no need for primers, plus a massive adhesive saving of 2kg/m², when compared to laying bonded cavity mat systems.

Time trials indicate the removal of subfloor preparation for installations provides a circa 50% time saving!

Lengthy waiting times on new screeds are avoided as Flexbone 2Easy can be laid on new sand:cement screeds when they are ready to be walked on, or new anhydrite screeds that aren’t fully cured (up to 1.5% CM residual moisture). This means no more projects on hold for weeks on end waiting for the screed to dry!

Fast-track installation is possible as any residual moisture in the substrate is distributed evenly through a system of perforations and channels in the mat, meaning the screed can fully cure under the tiling with no issues.

Because BAL Flexbone 2Easy is laid loose as a floating system, it is perfect for heritage projects where it is necessary to protect historic, sensitive substrates, or rental properties where tenants cannot alter the original décor, plus areas where the ability to change the floor fairly regularly can be a requirement – e.g. retail stores.

BAL Flexbone VAried is a bonded mat system, with the same installation process as other fixed cavity mat systems in the market.

Unique to BAL Flexbone is the patented GripLock Technology and unique bone structure.

The patented design has been independently tested to provide the highest shear strength (providing more accommodation of higher levels of lateral movement) and the highest tensile strength (to stops tiles ‘popping-off’, or cracking under pressure). These highly flexible and deformable properties ensure all tile installations are protected from lateral movement and pressures, while a special fleece provides for vapour pressure compensation.

As well as providing long-term benefits in terms of strength and flexibility, the unique bone structure also makes for significantly faster installations as the design ensures the trowelling-out of adhesive on the surface layer is fast and easy.

Fixer trials have shown that the unique bone-shaped cavities are much easier and faster to fill with adhesive than the conventional square or round cavities.

Less adhesive is required, and trials indicate areas can be completed circa. 30% faster.

BAL Flexbone VAried can be used anywhere – for a varied number of installation environments!

BAL Flexbone VAried provides a waterproof layer, meaning no tanking is needed in wet areas such as bathrooms, showers and wetrooms when BAL Flexbone VAried is installed.

The bonded mat is perfect for high load-bearing and commercial areas such as shopping malls, airports, car showrooms, office building and hospitals, as well as light or medium traffic areas.

Both mats are available in 20m rolls or easy to install 2x1m sheets and are suitable for use with all tile types, including natural stone.

As with all BAL products, BAL Flexbone uncoupling mats come with the manufacturer’s unique 25-year guarantee – unlike other cavity mats available.

When used with BAL adhesives, grouts, and sealants, this provides a fully guaranteed tiling system.

Protecting tiles with a DPM

With the number of planning applications for basement extensions rising by 183% according to research by Halifax, tilers need to be aware of the potential for moisture issues that can cause a floor to fail.

Adhesive failure, staining, discolouration and efflorescence can all occur due to moisture emanating from the subfloor, so it is essential that the final finished tiled floor is protected from the damaging effects of moisture from below with a Damp Proof Membrane (DPM)

Surface damp proof membranes, like new BAL DPM, will protect tile adhesive and tiles from both ground floor water and residual construction moisture found in new screeds such as sand: cement and calcium sulfate screeds.

As a rule of thumb, to achieve a moisture content of 0.5% water by weight (Carbide Bomb test) the drying time for a calcium sulfate screed – is approximately 1mm per day up to 40mm thickness under ideal site condition. Direct to earth cement: sand screeds will also require a DPM.

One solution is BAL DPM which acts to control moisture and allows for the early application of a levelling compound or tile adhesive.

BAL DPM can be applied onto a new cement: sand screed once the moisture content is below 98% RH as measured using an hygrometer. BAL DPM can be applied to new calcium sulfate screed   once the moisture content is below 87%.  Please note, it is important to obtain the screed manufacturer’s confirmation that the screed is compatible with a DPM and does not contain any additives that may reduce adhesion between the screed and the DPM.

Before laying the DPM, ensure that all screeds are well-prepared and flat, with any laitance removed.

As well as basements and cellars, a DPM should also be considered for other projects where a structural damp proof membrane is not present or is ineffective. This is likely to be the case in refurbishment projects involving buildings constructed pre-1970, where the installation of an effective structural damp proof membrane was not a requirement of the building regulations.

BAL DPM is also suitable for balconies, terraces and patios which are due to be tiled, dependent upon design consideration. A DPM on an external tiled area will protect moisture sensitive stone such as granite from staining due to rising ground floor water, as well as rain water. For external tiled areas, we would always advice on the use of a capillary passive drainage system like BAL’s new external tiling systems which ensure the rapid drainage of tiled surfaces.

As well as external areas, BAL DPM can be used in industrial installations that require resistance against dilute chemical spillages or pollutants such as chemical plants or manufacturing units.

Unlike other DPM systems, BAL DPM is also suitable for walls, as well as floors, as it is resistant to hydrostatic pressure. Refer to the Technical Data Sheet for detailed application instructions.

Waterproofer and Primer

As a multi-purpose product, BAL DPM can also be used as a one coat primer or as a two-coat waterproofing system.

When sand-blinded, BAL DPM allows tiling onto difficult substrates such as steel.

As a waterproofer, BAL DPM is an easy two-coat system when used with BAL Self-Adhesives Butyl Tape in corners and junctions.

For detailed application instructions as a primer and waterproofing please refer to the BAL DPM Technical Data Sheet.

For more information on new BAL DPM including how-to videos and technical information, visit www.bal-adhesives.com/newproducts


Tiling onto Calcium Sulfate (anhydrite) screeds

Calcium Sulfate or anhydrite screeds have grown in popularity over the last decade as they offer substantial benefits over traditional sand:cement screeds.

Easy to lay, low cost, fast-drying, pumpable, self-levelling and offering minimal shrinkage, anhydrite screeds are perfect for domestic or commercial projects. They are also suitable for underfloor heating so long as the pipes and associated heating elements are covered with at least 25mm of screed.

However, despite the numerous benefits associated with anhydrite screeds, fixers and installers need to aware of potential problems.

These types of screeds contain anhydrous (dry) Calcium Sulfate and aggregates instead of a cement-based binder. The binder comes as either an alpha hemi-hydrate (a stronger and harder crystalline form) or anhydrous Calcium Sulfate. When water is added the binders will form calcium Sulfate dihydrate – more commonly known as Gypsum. This reaction stops when the vast majority of the Calcium Sulfate binder is used up and is generally complete after a period of 3-7 days, leaving the remaining water to evaporate through the surface of the screed.

Before laying onto Calcium Sulfate screeds it is vital to ensure that the moisture content is at the correct level for the required floor finish. Typical values for moisture sensitive floor finishes are less than 0.5%  Water by Weight  or less than 75% relative humidity for impermeable floors and less than 1% w/w for more permeable floors.

As a general rule thumb the drying time for a Calcium Sulfate screed, so the moisture content reaches 0.5% w/w, is approximately 1mm per day up to 40mm in ideal drying conditions – i.e. air temperature of 20C with a relative humidity not greater than 65%. Drying times will significantly increase for thicker screeds or those in poor drying conditions.

Accelerated drying of Calcium Sulfate screeds may be used once the screed is at least 7 days old. It is at this point that we would recommend commissioning any underfloor heating. The system should be increased by approximately 5°C per day until the maximum required working temperature is reached or as per the underfloor heating manufacturer’s recommendations. This should be maintained for a minimum of one week, before being gradually reduced to around 15-20°C. Do not exceed a temperature of 55°C. Use of dehumidifiers will also help.

Before laying tiles or other finishes onto Calcium Sulfate screed one of the most important tasks is the removal of laitance.

Laitance is a weak layer of fine particles deposited on the surface of the screed as the anhydrite cures. This layer is too weak to tile onto and can also inhibit  drying  of the screed. Many of the failures we see are as a result of contamination of the adhesive by laitance – highlighting the importance of carrying out this step.

Laitance should be removed by light abrasion using a suitable sanding machine i.e. a rotary floor scarifier and a 60’s grit sandpaper. Remove excess dust completely with a vacuum cleaner. Abrading the surface is best carried out 4-6 days after the application of the screed and can assist in the drying out process. Scarifying the surface is even recommended with low laitance Calcium Sulfate/anhydrite screeds as this further aids adhesion.

All traffic should be kept off the screed until it has hardened sufficiently in accordance with the screed manufacturer’s instructions and should always be protected from contamination and damage from other trades. It is best to protect the screed fully until the flooring is applied using boarding.

If not protected as the project progresses it may result in the wearing or grinding down of the screed’s surface. If this does occur then further surface treatment may be required. Moisture should also be avoided as any reintroduction of water can result in damage to the screed integrity and may affect any installed heating pipes.

Before tiling we would recommend applying a primer to the prepared screed surface before application of the tile adhesive. Priming created an effective barrier and assists in making the surface more stable.

When selecting your tile adhesive, consideration should be given to factors such as the tile type, and the type and method of cleaning the floor whilst in service – i.e. how wet the finished floor may become and what are the risks associated with limited water penetration. Slow or rapid-setting tile adhesives can be used, depending on the tile type and environment.

When the adhesive is cured, the joints between the tiles should be filled with a suitable grout – please note that a minimum of 3mm for floor tiling is recommended.

For ceramic tiling movement joints will be required in these installations. Any movement joint, or joints likely to be subject to movement, in the Calcium Sulfate screed should coincide with the movement joints in the tile bed. Movement joints should be incorporated as outlined in British Standard BS 5385-3, 2014 Clauses 6.8 and 7.1.6. For heated screeds also refer to The TTA technical document Tiling to Calcium Sulfate based screeds

Last, but not least, before tiling onto Calcium Sulfate screeds we would always recommend getting professional technical advice from manufacturers to ensure your installations look great and last the test of time.

By David Wilson, UK Technical Services Manager

(First published in Contract Flooring Journal)