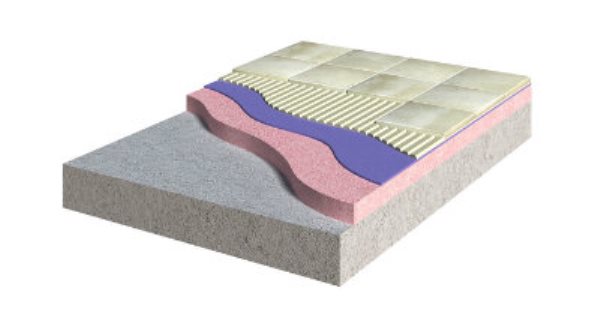
Easy to lay, low cost, fast-drying, pumpable and self-levelling, anhydrite screeds or calcium sulfate have grown in popularity over the last decade for new builds and renovations/extensions.
However despite the numerous benefits associated with laying an anhydrite screed, fixers need to be aware of the many potential pitfalls and problems when tiling.
The main issue with anhydrite screeds concerns moisture content and associated drying times. Because anhydrite screeds have a higher moisture content and dry through a chemical reaction followed by evaporation which drastically increases the time it takes for the screed to reach no more than 75% relative humidity (r/H %) or 0.5 Water by Weight (w/w) as required by British Standards.
When fast-track tiling is required consider the use of a Damp Proof Membrane such as BAL DPM. BAL DPM can be used on anhydrite screeds up to 87% RH.
Because of this need to reduce the moisture content, the drying time for anhydrite screeds is approximately 1mm per day up to 40mmin ideal drying conditions i.e. air temperature of 20C with a relative humidity not greater than 65%. Drying times will significantly increase for thicker screeds or those in poor drying conditions.
This means a typical anhydrite screed dries in about 49 days. Compare this to an OPC (Ordinary Portland Cement) screed which is dry in around 21 days, or even BAL QUICKSET CEMENT which dries within 4 – 48 hours, then you see where issues may occur.
Before tiling onto anhydrite always test the moisture content using a Hair Hygrometer (tests r/H%) or Carbide Bomb Testing (w/w).
Accelerated drying of anhydrite screeds may be used once the screed is at least 7 days old. It is at this point that we would recommend commissioning any underfloor heating. The system should be increased by approximately 5°C per day until the maximum required working temperature is reached or as per the underfloor heating manufacturer’s recommendations. This should be maintained for a minimum of one week, before being gradually reduced to around 15-20°C.
Another common cause of failure when tiling onto anhydrite screeds is Ettringite formation. This occurs when the cement in a tile adhesive reacts with the gypsum in the anhydrite screed, forming mineral crystals at the interface which can cause debonding.
To combat the formation of Ettringite, ensure that the surface is dry and seal with an appropriate BAL prime. Priming creates an effective barrier and assists in making the surface more stable. Contact BAL TECHNICAL ADVISORY SERVICE (TAS) for further information on dilution ratios.
As anhydrite cures, a weak layer of laitance is formed at the surface. This laitance is too weak to tile too and will also slow the drying process.
Laitance should be removed by light abrasion using a suitable sanding machine i.e. a rotary floor scarifier and a 60’s grit sandpaper. Remove excess dust completely with a vacuum cleaner. Abrading the surface is best carried out 4-6 days after the application of the screed and can assist in the drying out process; this will be done by the screeder. Once the screed is dry, the surface must be scarified again by the tile fixer to remove laitance and any surface contamination. Scarifying the surface is even recommended with low laitance Calcium Sulfate/anhydrite screeds as this further aids adhesion.
All traffic should be kept off the screed until it has hardened sufficiently in accordance with the screed manufacturer’s instructions and should always be protected from contamination and damage from other trades. Once the screed is fully dry and before tiling commences it is best to protect the screed fully by using boarding.
When selecting your tile adhesive, consideration should be given to tile type and application. Consider the impact of water penetration into the substrate. Flexible Slow or rapid-setting tile adhesives can be used, depending on the tile type and environment.
When the adhesive is cured, the joints between the tiles should be filled with a suitable flexible grout – a minimum of 3mm is usually recommended for grout joints and movement joints must always be considered, using a profile movement joint or silicone sealant such as BAL Micromax Sealant (which can be colour-matched with BAL Micromax2 grouts). For further information regarding preparation, adhesives, grouts and movement joints please contact BAL TAS.
*This is not a technical guide, always follow the manufacturer’s guidance and contact BAL TAS.


