Please Login to view this content. (Not a member? Join Today!)
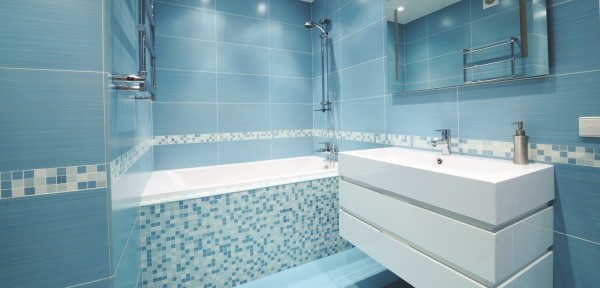
Throughout history, natural stone has been used as a building material, and to this day it continues to be used as a wall and floor cladding.
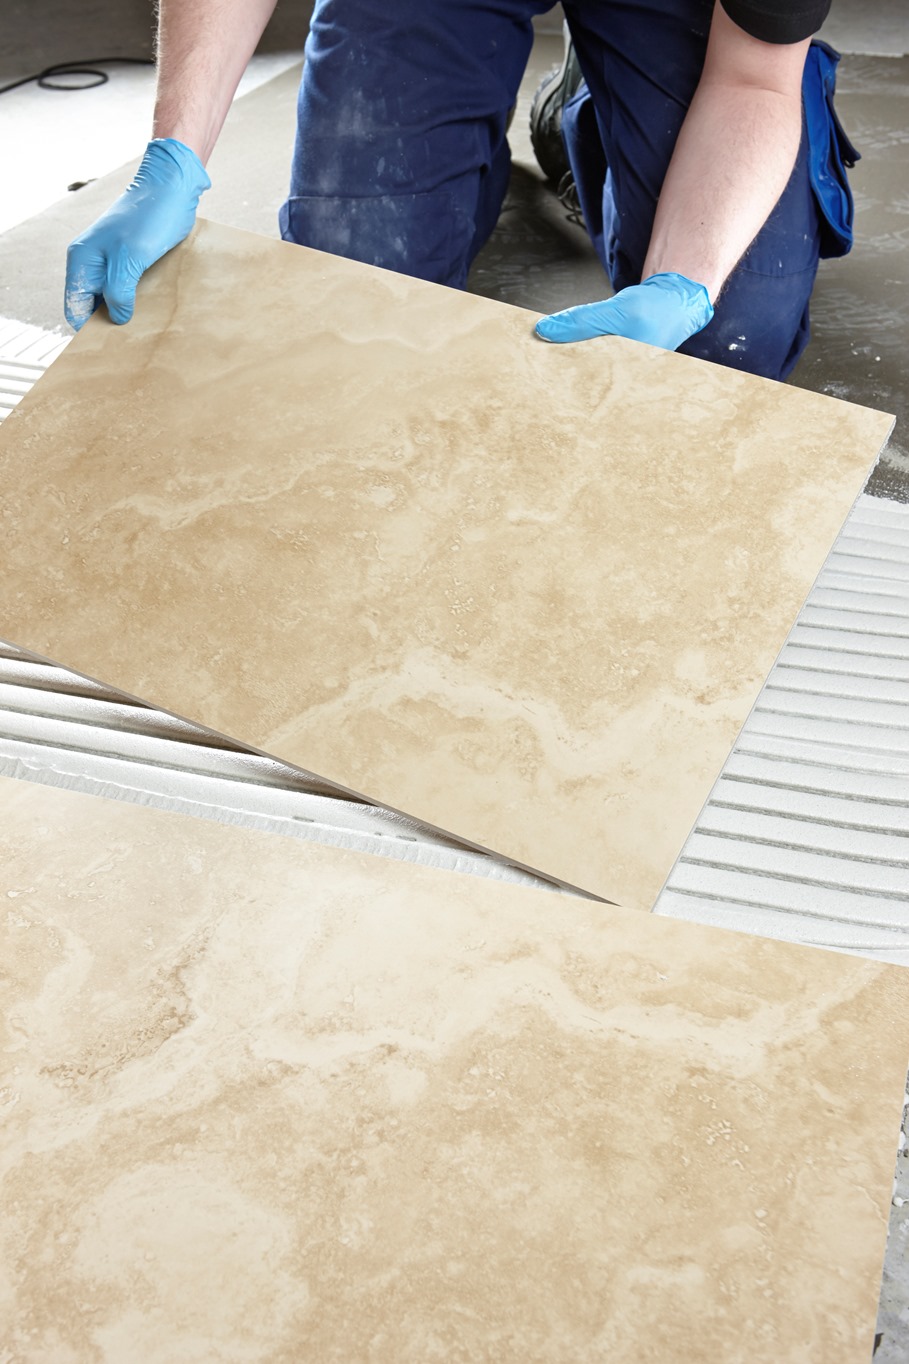
Natural stone has a timeless beauty that comes in a wide range of colours, sizes and textures. It also has practical qualities, providing a durable surface that will look good for years to come, making it a favourable choice for commercial and domestic installations.
Installation of natural stone is a matter of knowledge and balance; the knowledge to identify the variables that can affect i.e. adhesion to a suitable substrate, and the ability to get the right balance between the stone, the substrate, and the environmental conditions to which the stone will be subjected to on site and in service.
Granite, limestone, marble, travertine, sandstone and slate all have different physical properties and correct selection of a suitable tile adhesive is very important, dependent upon where the stone is being installed
The first consideration when tiling with natural stone is making sure your background is prepared correctly in accordance with the recommendations given in British Standards BS 5385: Part 1 (internal walls) ) Part 5 (includes Natural stone and slab flooring) and Annex E of BS 5385 Part 3 (underfloor heating).
New concrete must be air dried for at least 6 weeks before tiling, while new sand:cement screeds need a minimum of three weeks. If you’re in a hurry, there is always the potential to use a quick-setting product, such as BAL Quickset Cement as replacement for Portland cement in cement:sand screeds that you can tile on in just 24 hours (4 hours for bonded screeds) or use BAL Flexbone 2Easy a floating uncoupling mat that can go on new screeds that are walkable. Plus with Flexbone 2Easy no preparation is required under the mat.
Before tiling onto calcium sulfate screed, it’s important that all laitance is removed after 2-6 days, and the floor is fully dry with moisture levels less than 75% relative humidity (0.5% CM). This can take anywhere from 40 – 80 days depending on thickness. Drying time is approximately 1 day per mm up to 40mm, and 2 days per mm for screeds greater than 40mm. Alternatively you can use new BAL Flexbone 2Easy which can be laid direct to an anhydrite screed at 1.5% CM.
If you’re tiling onto a screed that incorporates underfloor heating, there are more considerations before fixing can commence. For sand:cement screeds a minimum of 3-week drying period should be followed by a slow warming of the screed: about 5oC per day up to the maximum operation where it needs to be held for three days, or as per the heating manufacturer’s recommendation. Then allow it to cool, preferably with the heating off, or turned down below 15oC if the weather’s cold. A pre-warm up should also be considered for other backgrounds with underfloor heating, including anhydrite screeds. If commissioned, temperature should be gradually increased by 5°C per day approximately 7 days after initial drying until the maximum required working temperature is reached. This should be maintained for a minimum of one week, before being gradually reduced to around 15-20°C.
For heated floors use of suitable uncoupling matting, such as BAL Rapid-Mat or BAL Flexbone is recommended for applying stone tiles onto heated screeds.
For new walls, don’t expect to fix over new Portland cement:sand render before at least 2 weeks’ drying – unless you’ve using BAL Quickset Render or similar, which sets in two hours at 20°C.
No such waiting, though, if boards – such as new BAL Board – are the background substrate. But you must check that the stone tiles (plus adhesive) aren’t going to be too heavy. On gypsum plasterboard, for example, the limit is 32kg/m² – typically 10mm thickness for stone is the maximum. For other proprietary boards, such as lightweight tilebacker boards and glass reinforced cement boards, check with manufacturer as they may able to cope with heavier weights. With BAL Board, the weight limit is 100kg/m², making it perfect for use with natural stone tiles.
When installing natural stone with tile adhesives, special attention should be given to your choice of adhesive. Some carbonate-based stones, such as marble, travertine and limestone, may be susceptible to drawing in residual moisture from the tile adhesive, which has the potential to cause problems. If this happens there is a strong risk of the stone being stained or watermarked. Furthermore, excessive residual moisture has the potential to react with certain minerals (such as iron oxides) and organic deposits in the stone, which could discolour the face of the tile. For certain types of stone use a rapid-setting white cement based adhesive such as BAL Rapid-Flex One.
When using large format un-calibrated stone, to achieve a flat tiled surface, it is advisable to use a thick-bed pourable adhesive, such as BAL Pourable One. Trusted pourable products can offer bed thickness up to 25mm, and can be grouted after three hours due to fast-setting properties. The cement chemistry in this product uses up more of the water during hydration, thereby reducing water that could cause staining or reducing the likelihood of water staining.
Some types of ‘green’ stone, can become dimensionally unstable when wet. Always fix these with a resin-based adhesive – for example, an epoxide resin type R1 or R2 to BS EN 12004: 2007+A1 2012.
Importantly, when fixing, don’t ever consider spot fixing natural stone tiles. “Dob & Dab” fixing is the cause of many installation failures. As with ceramic tiles, when fixing in wet duty areas or on floors, they must have a solid bed of adhesive to ensure all voids beneath the stone are eliminated.
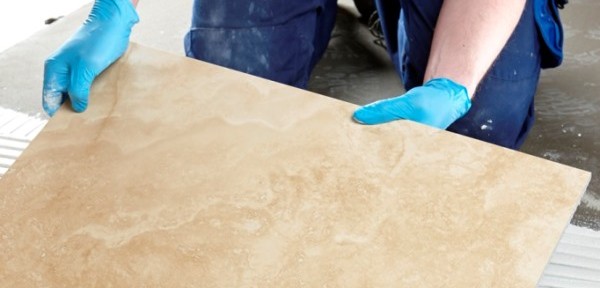
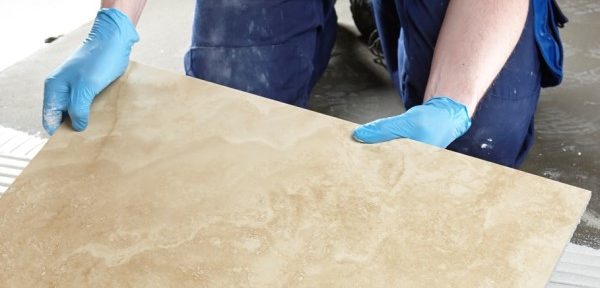
When tiling natural stone, solid-bed fixing should be adopted to achieve 100% bonding at the back of the tiles. Back buttering of a tile is recommended with uneven stone and/or large format tiles. Alternatively a suitable pourable flexible adhesives may alleviate the need for back buttering with large format stone and can help to speed up project time when floor tiling.
The risk of spoiling the effect of natural stone is greatest when the grouting stage is reached. It’s generally wise to choose a grout colour that is similar to the stone tile colour – particularly with porous stone..
On very porous stone, the result can be a rough ‘picture frame’ effect around stone edges, unless tiles are sealed with a suitable sealer. The risk is also reduced by using reputable cement-based grouts containing a water-retaining agent, or by use of a rapid setting grout.
When grouting natural stone, it’s advisable to carry out a trial on a small area to determine the risk of staining. When in doubt, use a suitable protective sealer and repeat the trial to ensure a satisfactory result is achieved.
Finally to ensure installation success, it’s important that movement joints are incorporated in the floor tiling. For perimeter joints, a suitable neutral curing silicone or similar is generally advised in movement joints for stone tiling. That’s because acid curing sealants (e.g. acetoxy silicones) are bad news for some types of natural stone, especially marble and limestone. They chemically react with carbonates in the stone causing de-bonding at the edges.
In high traffic areas, however, avoid sealant movement joints should be avoided altogether because they won’t prevent stone edge damage. In these cases, proprietary pre-formed movement joints are recommended.
Overall there is a lot for fixers to consider, but by taking the appropriate steps at each stage, there is no reason why the beauty of a natural stone finish cannot be successfully installed and maintained for years to come.
For technical advice and training that can be trusted, contact BAL Technical Advisory Service on 03330 030160 or our Innovation and Technology Centre on 01782 591120.
By David Wilson, UK Technical Services Manager
(First published in Tile and Stone Journal)
Calcium Sulfate or anhydrite screeds have grown in popularity over the last decade as they offer substantial benefits over traditional sand:cement screeds.
Easy to lay, low cost, fast-drying, pumpable, self-levelling and offering minimal shrinkage, anhydrite screeds are perfect for domestic or commercial projects. They are also suitable for underfloor heating so long as the pipes and associated heating elements are covered with at least 25mm of screed.
However, despite the numerous benefits associated with anhydrite screeds, fixers and installers need to aware of potential problems.
These types of screeds contain anhydrous (dry) Calcium Sulfate and aggregates instead of a cement-based binder. The binder comes as either an alpha hemi-hydrate (a stronger and harder crystalline form) or anhydrous Calcium Sulfate. When water is added the binders will form calcium Sulfate dihydrate – more commonly known as Gypsum. This reaction stops when the vast majority of the Calcium Sulfate binder is used up and is generally complete after a period of 3-7 days, leaving the remaining water to evaporate through the surface of the screed.
Before laying onto Calcium Sulfate screeds it is vital to ensure that the moisture content is at the correct level for the required floor finish. Typical values for moisture sensitive floor finishes are less than 0.5% Water by Weight or less than 75% relative humidity for impermeable floors and less than 1% w/w for more permeable floors.
As a general rule thumb the drying time for a Calcium Sulfate screed, so the moisture content reaches 0.5% w/w, is approximately 1mm per day up to 40mm in ideal drying conditions – i.e. air temperature of 20C with a relative humidity not greater than 65%. Drying times will significantly increase for thicker screeds or those in poor drying conditions.
Accelerated drying of Calcium Sulfate screeds may be used once the screed is at least 7 days old. It is at this point that we would recommend commissioning any underfloor heating. The system should be increased by approximately 5°C per day until the maximum required working temperature is reached or as per the underfloor heating manufacturer’s recommendations. This should be maintained for a minimum of one week, before being gradually reduced to around 15-20°C. Do not exceed a temperature of 55°C. Use of dehumidifiers will also help.
Before laying tiles or other finishes onto Calcium Sulfate screed one of the most important tasks is the removal of laitance.
Laitance is a weak layer of fine particles deposited on the surface of the screed as the anhydrite cures. This layer is too weak to tile onto and can also inhibit drying of the screed. Many of the failures we see are as a result of contamination of the adhesive by laitance – highlighting the importance of carrying out this step.
Laitance should be removed by light abrasion using a suitable sanding machine i.e. a rotary floor scarifier and a 60’s grit sandpaper. Remove excess dust completely with a vacuum cleaner. Abrading the surface is best carried out 4-6 days after the application of the screed and can assist in the drying out process. Scarifying the surface is even recommended with low laitance Calcium Sulfate/anhydrite screeds as this further aids adhesion.
All traffic should be kept off the screed until it has hardened sufficiently in accordance with the screed manufacturer’s instructions and should always be protected from contamination and damage from other trades. It is best to protect the screed fully until the flooring is applied using boarding.
If not protected as the project progresses it may result in the wearing or grinding down of the screed’s surface. If this does occur then further surface treatment may be required. Moisture should also be avoided as any reintroduction of water can result in damage to the screed integrity and may affect any installed heating pipes.
Before tiling we would recommend applying a primer to the prepared screed surface before application of the tile adhesive. Priming created an effective barrier and assists in making the surface more stable.
When selecting your tile adhesive, consideration should be given to factors such as the tile type, and the type and method of cleaning the floor whilst in service – i.e. how wet the finished floor may become and what are the risks associated with limited water penetration. Slow or rapid-setting tile adhesives can be used, depending on the tile type and environment.
When the adhesive is cured, the joints between the tiles should be filled with a suitable grout – please note that a minimum of 3mm for floor tiling is recommended.
For ceramic tiling movement joints will be required in these installations. Any movement joint, or joints likely to be subject to movement, in the Calcium Sulfate screed should coincide with the movement joints in the tile bed. Movement joints should be incorporated as outlined in British Standard BS 5385-3, 2014 Clauses 6.8 and 7.1.6. For heated screeds also refer to The TTA technical document Tiling to Calcium Sulfate based screeds
Last, but not least, before tiling onto Calcium Sulfate screeds we would always recommend getting professional technical advice from manufacturers to ensure your installations look great and last the test of time.
By David Wilson, UK Technical Services Manager
(First published in Contract Flooring Journal)
Calcium Sulfate or anhydrite screeds have grown in popularity over the last decade as they offer substantial benefits over traditional sand:cement screeds.
Easy to lay, low cost, fast-drying, pumpable, self-levelling and offering minimal shrinkage, anhydrite screeds are perfect for domestic or commercial projects. They are also suitable for underfloor heating so long as the pipes and associated heating elements are covered with at least 25mm of screed.
However, despite the numerous benefits associated with anhydrite screeds, fixers and installers need to aware of potential problems.
These types of screeds contain anhydrous (dry) Calcium Sulfate and aggregates instead of a cement-based binder. The binder comes as either an alpha hemi-hydrate (a stronger and harder crystalline form) or anhydrous Calcium Sulfate. When water is added the binders will form calcium Sulfate dihydrate – more commonly known as Gypsum. This reaction stops when the vast majority of the Calcium Sulfate binder is used up and is generally complete after a period of 3-7 days, leaving the remaining water to evaporate through the surface of the screed.
Before laying onto Calcium Sulfate screeds it is vital to ensure that the moisture content is at the correct level for the required floor finish. Typical values for moisture sensitive floor finishes are less than 0.5% Water by Weight or less than 75% relative humidity (RH) for impermeable floors and less than 1% w/w for more permeable floors. When fast-track tiling is required consider the use of a Damp Proof Membrane such as BAL DPM. BAL DPM can be used on anhydrite screeds up to 87% RH.
As a general rule thumb the drying time for a Calcium Sulfate screed, so the moisture content reaches 0.5% w/w, is approximately 1mm per day up to 40mm in ideal drying conditions – i.e. air temperature of 20C with a relative humidity not greater than 65%. Drying times will significantly increase for thicker screeds or those in poor drying conditions.
Accelerated drying of Calcium Sulfate screeds may be used once the screed is at least 7 days old. It is at this point that we would recommend commissioning any underfloor heating. The system should be increased by approximately 5°C per day until the maximum required working temperature is reached or as per the underfloor heating manufacturer’s recommendations. This should be maintained for a minimum of one week, before being gradually reduced to around 15-20°C. Do not exceed a temperature of 55°C. Use of dehumidifiers will also help.
Before laying tiles or other finishes onto Calcium Sulfate screed one of the most important tasks is the removal of laitance.
Laitance is a weak layer of fine particles deposited on the surface of the screed as the anhydrite cures. This layer is too weak to tile onto and can also inhibit drying of the screed. Many of the failures we see are as a result of contamination of the adhesive by laitance – highlighting the importance of carrying out this step.
Laitance should be removed by light abrasion using a suitable sanding machine i.e. a rotary floor scarifier and a 60’s grit sandpaper. Remove excess dust completely with a vacuum cleaner. Abrading the surface is best carried out 4-6 days after the application of the screed and can assist in the drying out process. Scarifying the surface is even recommended with low laitance Calcium Sulfate/anhydrite screeds as this further aids adhesion.
All traffic should be kept off the screed until it has hardened sufficiently in accordance with the screed manufacturer’s instructions and should always be protected from contamination and damage from other trades. It is best to protect the screed fully until the flooring is applied using boarding.
If not protected as the project progresses it may result in the wearing or grinding down of the screed’s surface. If this does occur then further surface treatment may be required. Moisture should also be avoided as any reintroduction of water can result in damage to the screed integrity and may affect any installed heating pipes.
Before tiling we would recommend applying a primer to the prepared screed surface before application of the tile adhesive. Priming created an effective barrier and assists in making the surface more stable.
When selecting your tile adhesive, consideration should be given to factors such as the tile type, and the type and method of cleaning the floor whilst in service – i.e. how wet the finished floor may become and what are the risks associated with limited water penetration. Slow or rapid-setting tile adhesives can be used, depending on the tile type and environment.
When the adhesive is cured, the joints between the tiles should be filled with a suitable grout – please note that a minimum of 3mm for floor tiling is recommended.
For ceramic tiling movement joints will be required in these installations. Any movement joint, or joints likely to be subject to movement, in the Calcium Sulfate screed should coincide with the movement joints in the tile bed. Movement joints should be incorporated as outlined in British Standard BS 5385-3, 2014 Clauses 6.8 and 7.1.6. For heated screeds also refer to The TTA technical document Tiling to Calcium Sulfate based screeds
Last, but not least, before tiling onto Calcium Sulfate screeds we would always recommend getting professional technical advice from manufacturers to ensure your installations look great and last the test of time.
By David Wilson, UK Technical Services Manager
(First published in Contract Flooring Journal)